Using the QuickTime Exporter 55
Make sure the 18. scene_02.mov layer is selected. Select Effect > Simulation >
CC Snow. The effect adds falling snow to the animation. You can control the
amount of snow, its size, and rate of descent in the Effect Controls panel.
Figure 2.30: The CC Snow effect automatically generates falling snow on a layer.
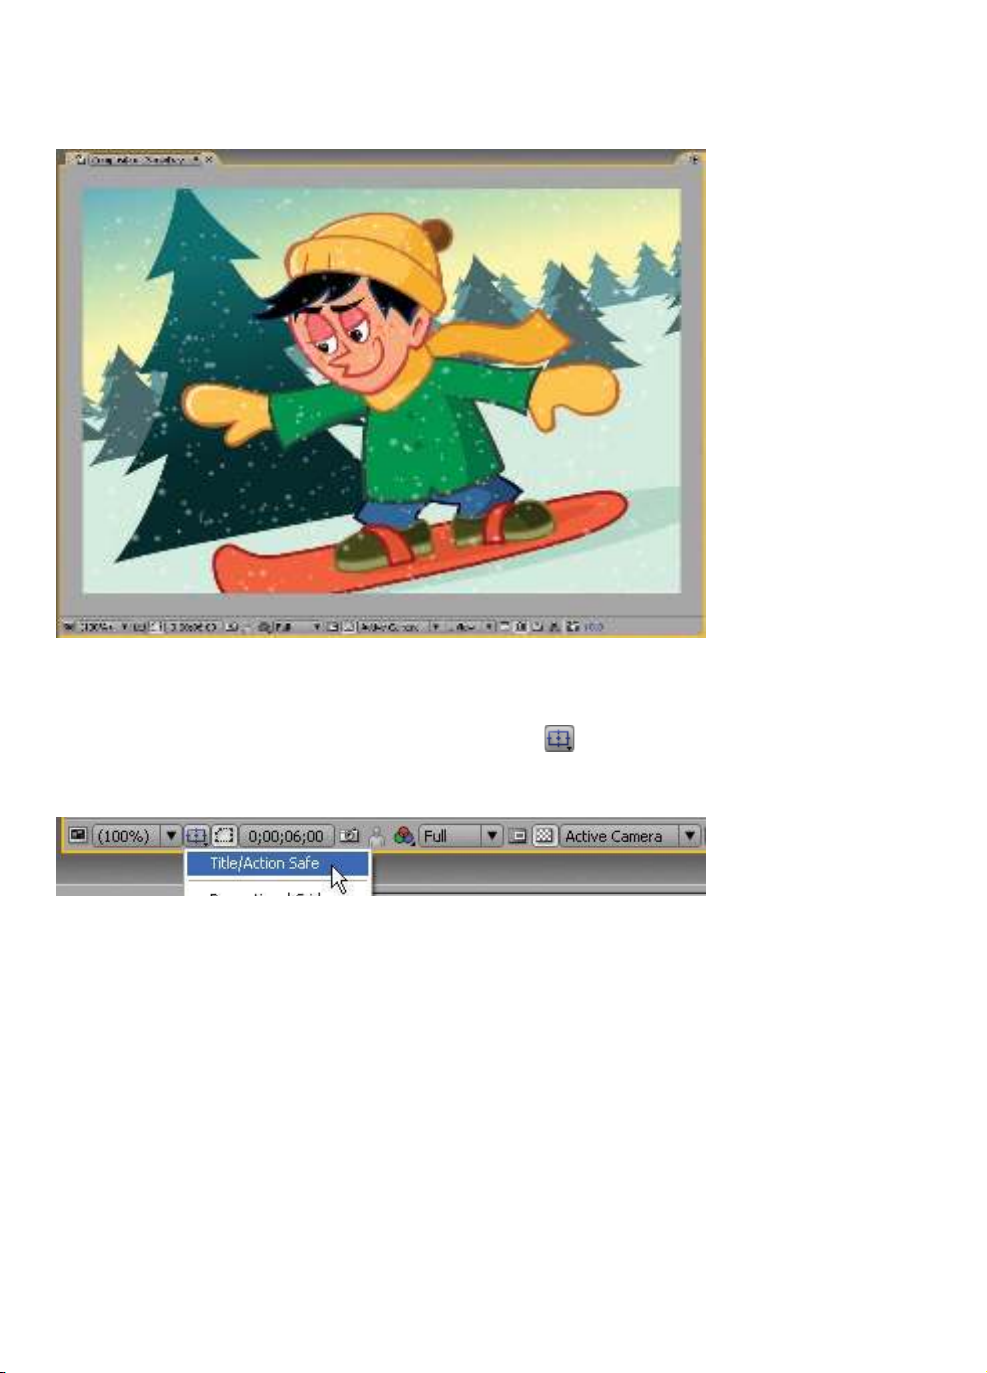
After Effects has the Title Safe and Action Safe guides built into the Comp
19.
Window. To make them visible, click on the Grid & Guides button at
the bottom left of the Composition panel. Select Title/Action Safe from the
popup menu (Figure 2.31). The guidelines appear in the Comp Window.
Figure 2.31: After Effects has the Title Safe and Action Safe guides built in.
Select
20. Composition > Make Movie.
Click on
21. Lossless next to Output Module. Set the Format to QuickTime movie.
Click on Format Options and set the compression setting to MPEG-4 Video.
Click on Output To and select the Chapter_02 folder on your hard drive as
the final destination for the rendered movie.
Click the
22. Render button. Save your project. As you can see, rendering frame-
based animation using the QuickTime Exporter in Flash is fairly straightforward.
What’s the benefit of using it over importing a SWF into After Effects? In this
example, none. In some cases it is better to use the SWF file. So why use it? The
next exercise clearly demonstrates the benefit of using the QuickTime Exporter.

56 Chapter 2: From Flash to After Effects
Exporting ActionScript-driven Movies
Flash CS3 introduced the ability to export content over a period of time to
a QuickTime file format. You define the amount of time and the QuickTime
Exporter records the movement on the Stage whether it is frame-by-frame
or ActionScript driven. This is a huge improvement and good news for Flash
programmers who want to export their dynamically driven movies to video.
This final exercise provides a step-by-step tutorial on exporting an ActionScript-
driven animation using the QuickTime Exporter. To see an example, locate and
play the SpaceWars.mov in the Completed folder inside the 03_ActionScript
folder (Figure 2.32). When you finish this exercise you will be able to export
movie clips controlled by ActionScript to a video format.
Figure 2.32: The finished QuickTime movie file uses ActionScript-driven content.
The retro rocketship was created in Flash as a short, frame-by-frame animation
stored in a movie clip. Through the use of ActionScript, the movie clip is
duplicated six times and positioned off the left edge of the Stage. Over time,
each duplicated ship moves across the Stage at a random speed.
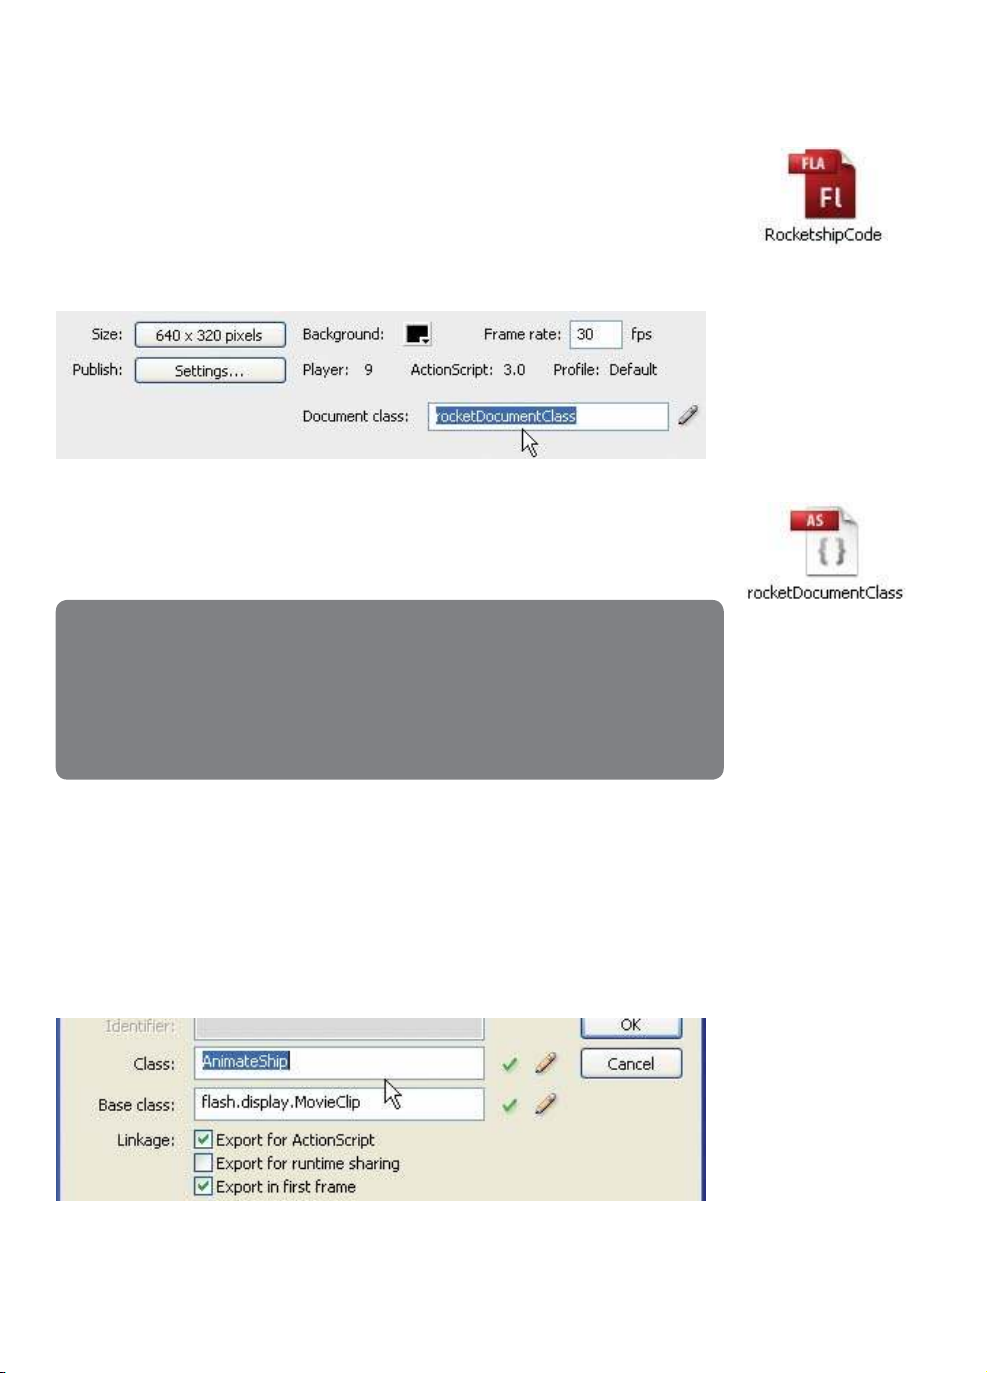
Let’s first deconstruct the Flash code. Open the
1. 03_ActionScript folder inside
the Chapter_02 folder. Here is the breakdown of the files you will look at:
RocketshipCode.fla
3 is the Flash document that stores the retro rocketship
movie clip in its Library.
rocketDocumentClass.as
3 is the Document Class that duplicates the ships
and defines their initial position and speed.
AnimateShip.as
3 is an ActionScript file that positions and moves each ship.
Exporting ActionScript-driven Movies 57
Double-click on 2. RocketshipCode.fla to open the file in Flash. The Stage is set
to a customized size of 640 x 320 pixels. There is nothing on the Stage or in
the Timeline. The Library stores the rocketship movie clip.
Select
3. Control > Test Movie to preview the animation. Each time you test the
movie, you will see six rocketships fly across the Stage at random speeds.
Close the SWF file and return to Flash. Go to the Properties panel. Notice that
4.
the Document class field contains rocketDocumentClass. This is the link to a
separate ActionScript file that will set up the animation for this Flash document.
Figure 2.33: Link to the Document Class file in the Properties panel.
Select
5. File > Open. Choose rocketDocumentClass.as in the 03_ActionScript
folder. Click Open. The code duplicates the rocketship six times using a for loop.
Each time through the loop a new movie clip object (AnimateShip) is created.
For each new object, a random horizontal and vertical position is created based
on the dimensions of the Stage. It also generates a random speed value. These
three random numbers are passed as parameters to the AnimateShip.as file.
The last line of code (addChild) draws the movie clip instance on the Stage.
Select
6. File > Open. Choose AnimateShip.as in the 03_ActionScript folder. Click
Open. This code is linked to the movie clip in RocketshipCode.fla through the
Linkage Properties panel in the Library (Figure 2.34).
Figure 2.34: Link to the ActionScript file in the Linkage Properties panel.
public function rocketDocumentClass() {
for(var i:uint=0; i < 6; i++) {
var ship:AnimateShip = new AnimateShip(Math.random()*640 - 700,
Math.random()*200 + 60, Math.random()*10 + 5);
addChild(ship);
}
}

58 Chapter 2: From Flash to After Effects
Each time the Document Class creates an object, this AS file is attached to the 7.
new rocketship. Remember, this code is linked to the movie clip. The Action-
Script basically tells the ship where to go and how to move across the Stage
based on certain parameters sent by the Document Class.
The code first creates a variable called speedX. This will be used to move the
ship horizontally across the Stage. The Class Constructor is defined and the
parameters from the Document Class are stored in x,y, and dx. The first two
parameters are used to position the ship. The rocketship’s scale is set to 40%.
An Event Listener “listens” for the playback head entering the frame. It calls an
event handler that moves the ship. Since this file is continuously entering the
same frame, this function is called repeatedly, creating the movement. The rate
at which the ship animates is based on the value stored in dx.
Return to the
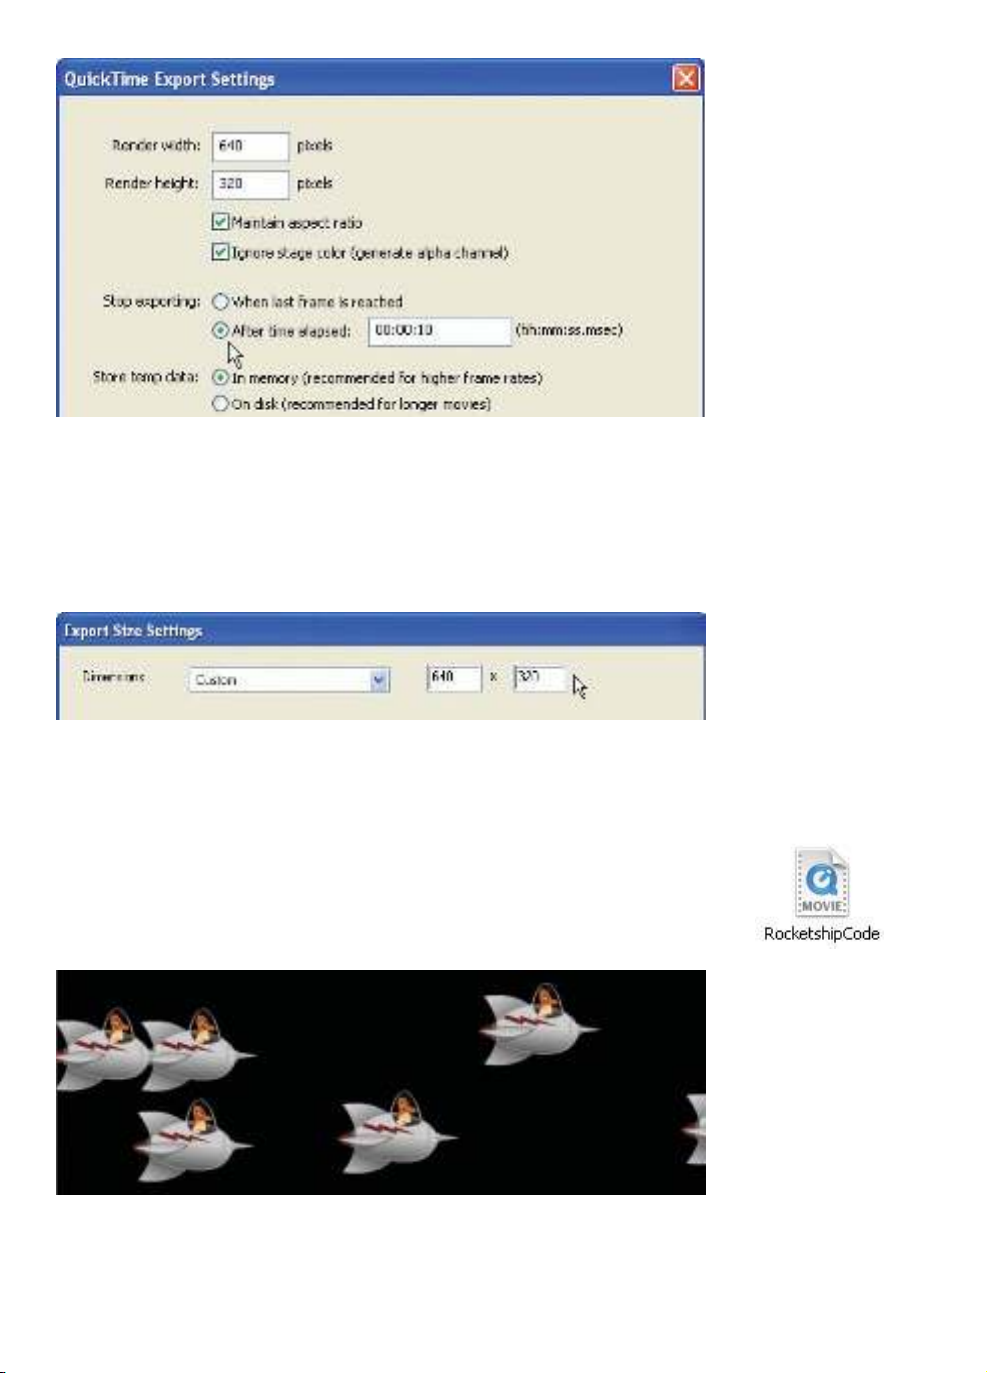
8. RocketshipCode.fla file. Select File > Export > Export Movie.
This opens the QuickTime Movie dialog box. Select the 03_ActionScript folder
inside the Chapter_02 folder on your hard drive as the final destination for the
rendered movie. Make sure the file format is set to QuickTime. Click Save.
The QuickTime Export Settings dialog box appears. Make sure the width
9.
and height are set to 640 and 320 respectively.
Check the checkbox to
10. Ignore Stage Color. An alpha channel will be
generated to use in After Effects.
In the Stop Exporting area select
11. After Time Elapsed and enter 00:00:10. Flash
will record activity on the Stage for 10 seconds (Figure 2.35). This method
includes movie clips in the captured frames. Click on QuickTime Settings.
public class AnimateShip extends MovieClip {
// define variable to hold positive speed
private var speedX:uint;
// create constructor
public function AnimateShip(x,y,dx) {
// set scale, location, and speed
this.scaleX = this.scaleY = .4;
this.x = x;
this.y = y;
speedX = dx;
// move the ship to the left each frame
this.addEventListener(Event.ENTER_FRAME, moveShip);
}
// move according to speed set in DocumentClass
public function moveShip(event:Event) {
// move the ship to the left
this.x += speedX;
}
}
Exporting ActionScript-driven Movies 59
Figure 2.35: To export ActionScript-driven content, select After Time Elapsed and
enter a value. Flash will record any activity on the Stage for the time entered.
Click on the
12. Size button under the Video area. This opens the Export Size
Settings dialog box (Figure 2.36). Make sure the width and height are set to
640 and 320 respectively. Click OK twice to return to the QuickTime Export
Settings dialog box.
Figure 2.36: Make sure the Export Size matches the Stage dimensions.
Quit out of all other applications so only Flash is running. Click
13. Export. A dialog
box will appear when the QuickTime movie is complete. Click OK.
Go to the 03_ActionScript folder on your hard drive where you will find the
14.
QuickTime movie. Launch the QuickTime movie in the QuickTime player. The
ability to export ActionScript-driven content is a great improvement for Flash
and opens the door wider in creating content for After Effects.
Figure 2.37: The QuickTime Exporter recorded the code-driven animation.