CANINE
B
B
Br
r
re
e
en
n
nd
d
da
a
a
H
H
Ho
o
od
d
dd
d
di
i
in
n
no
o
ot
t
tt
t
t
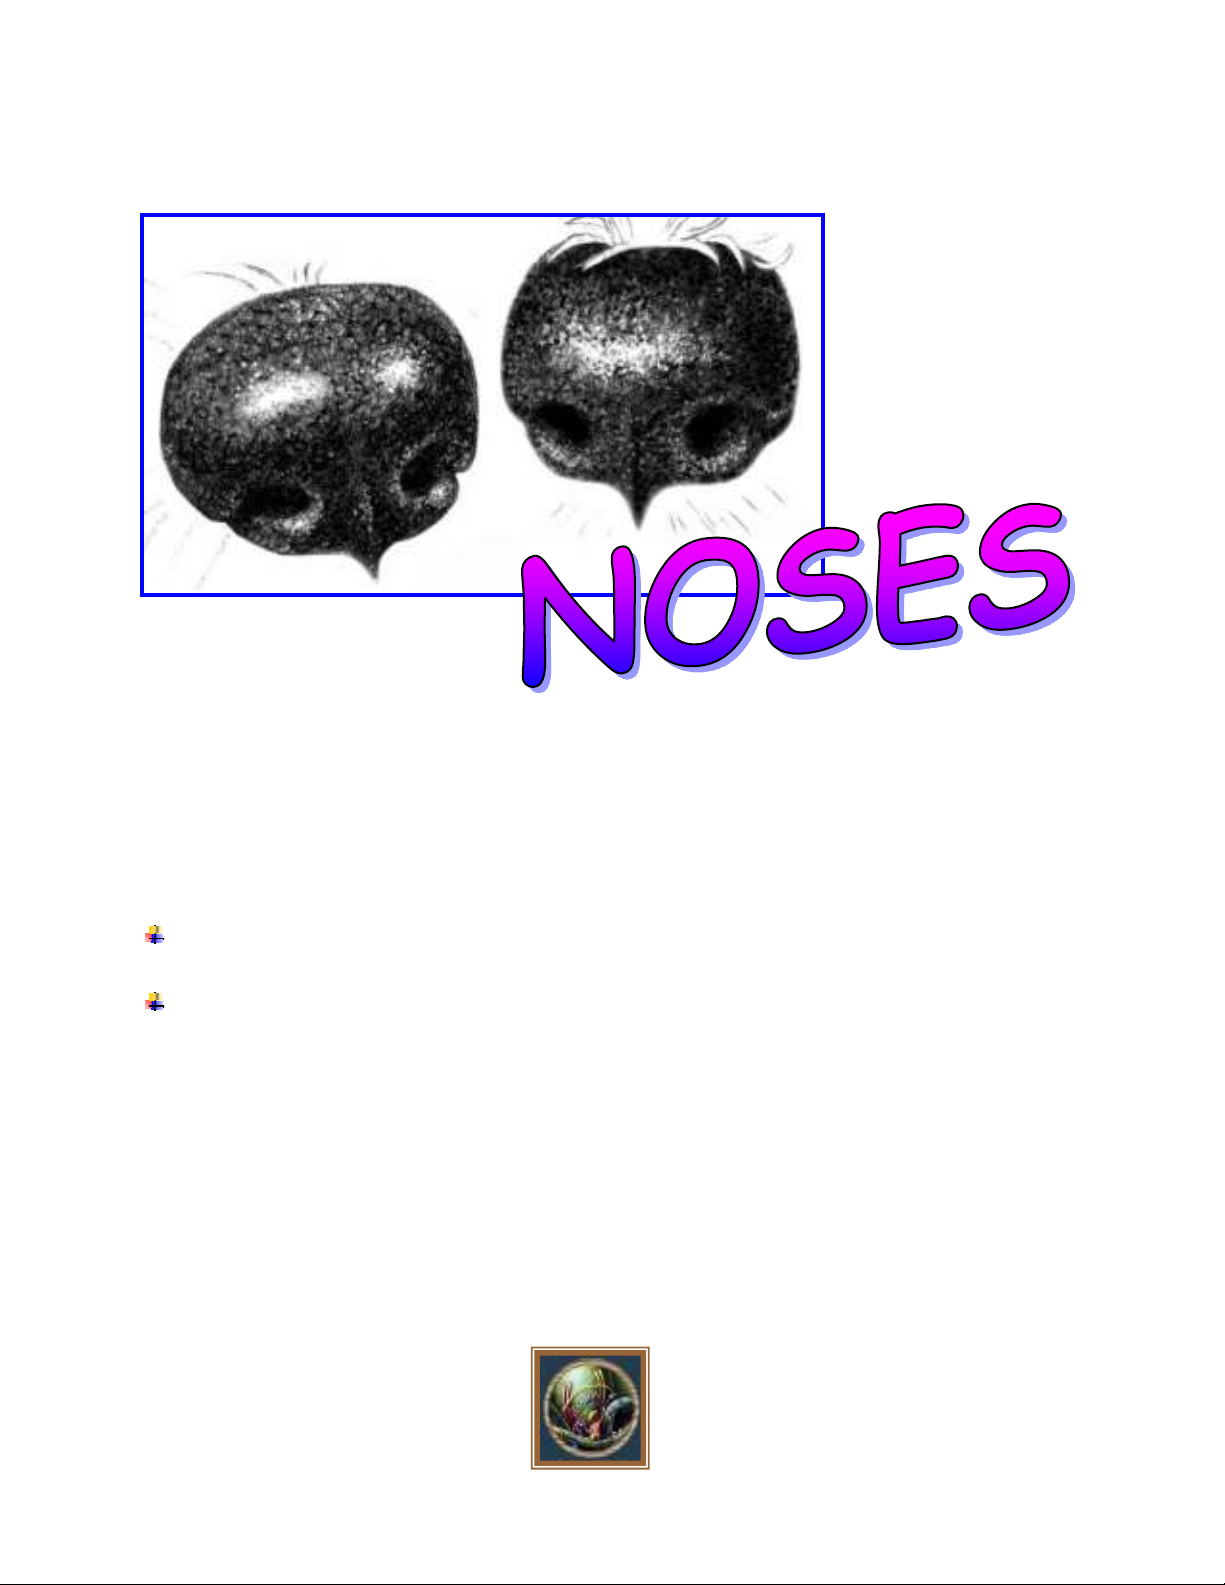
I-02 BEGINNER: CARTOONS & CRITTERS
This project challenges you to draw two dog noses from slightly different perspectives. You may
find the lessons in D Beginner: Squirkling extremely helpful as you try your hand at squirkling
graduations of textured shading.
This lesson is divided into the following two parts:
FRONTAL VIEW OF A DOG NOSE: You draw a simple frontal view of a dog nose,
while being challenged to rely on visual skills rather than text instructions.
ANGULAR VIEW OF A DOG NOSE: People who love dogs simply can’t resist that
adorable tilt of their heads as they look at your face and listen attentively. Naturally, when
the head is tilted, the nose must also be drawn at an angle.
Suggested drawing supplies include good quality white drawing paper, graphite pencils, kneaded
and vinyl erasers, and a pencil sharpener.
12 PAGES – 28 ILLUSTRATIONS
This project is recommended for artists from age 12 to adult, as well as home schooling,
academic and recreational fine art educators.
Published by Hoddinott Fine Art Publishers, Halifax, NS, Canada – 2004 (Revised 2006)
Copyright to all articles, images, text, projects, lessons and exercises within this drawing class belong to Brenda Hoddinott and may
not be reproduced or used for any commercial purposes whatsoever without the written permission of Brenda Hoddinott.
E-mail bhoddinott@hoddinott.com Web sites http://www.finearteducation.com and http://www.drawspace.com
-2 -
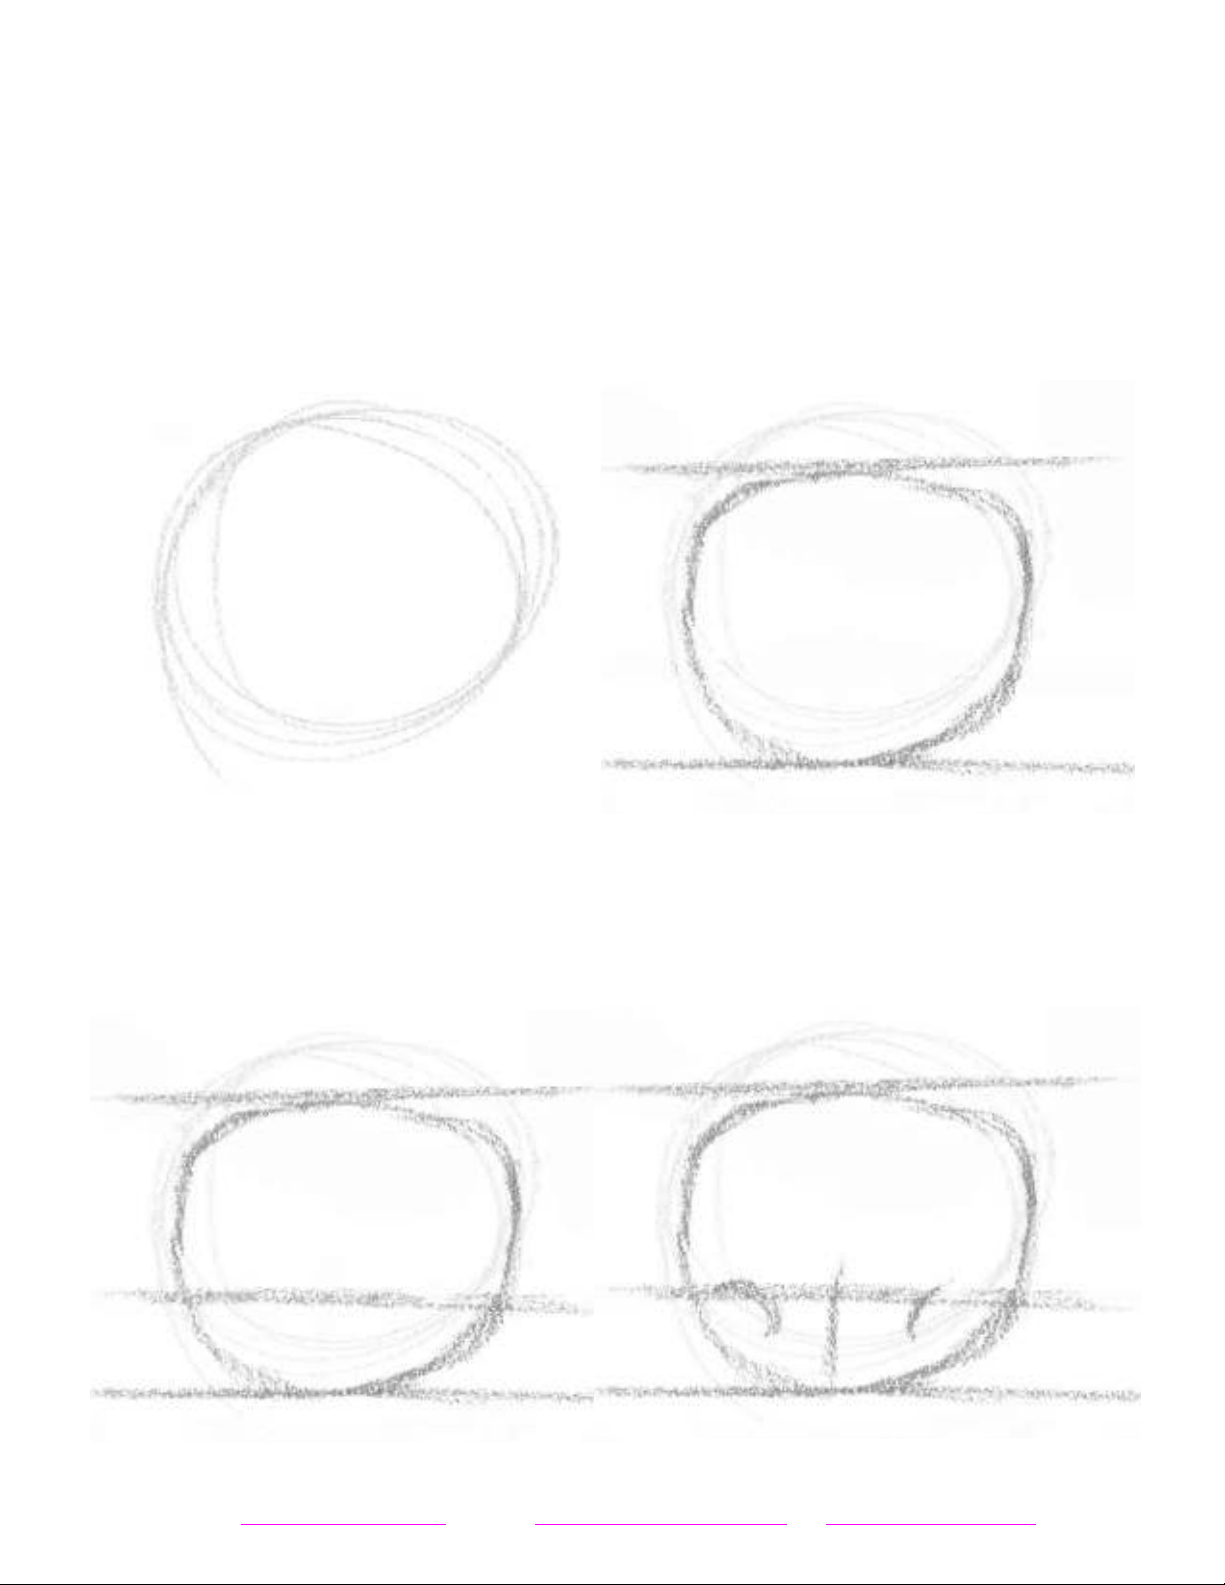
FRONTAL VIEW OF A DOG NOSE
This lesson challenges you to rely on your visual skills rather than text instructions. The initial
sketch lines throughout Steps 1 to 4 establish proportions. A Sketch is a simple drawing that
captures the integral aspects of your subject quickly and efficiently. Proportion is the
relationship in size of one component of a drawing to another or others.
STEP 1 STEP 2
The sketch lines and the outlines look dark in many of my illustrations. However, in reality they
are so light that I can barely see them. I have made them look darker in a computer program so
you can see them. Keep your lines very light by pressing very gently with your pencil (I used an
HB). No matter how careful you are, accidents do happen, and you may need to erase sections
you aren’t happy with.
STEP 3 STEP 4

Copyright to all articles, images, text, projects, lessons and exercises within this drawing class belong to Brenda Hoddinott and may
not be reproduced or used for any commercial purposes whatsoever without the written permission of Brenda Hoddinott.
E-mail bhoddinott@hoddinott.com Web sites http://www.finearteducation.com and http://www.drawspace.com
-3 -
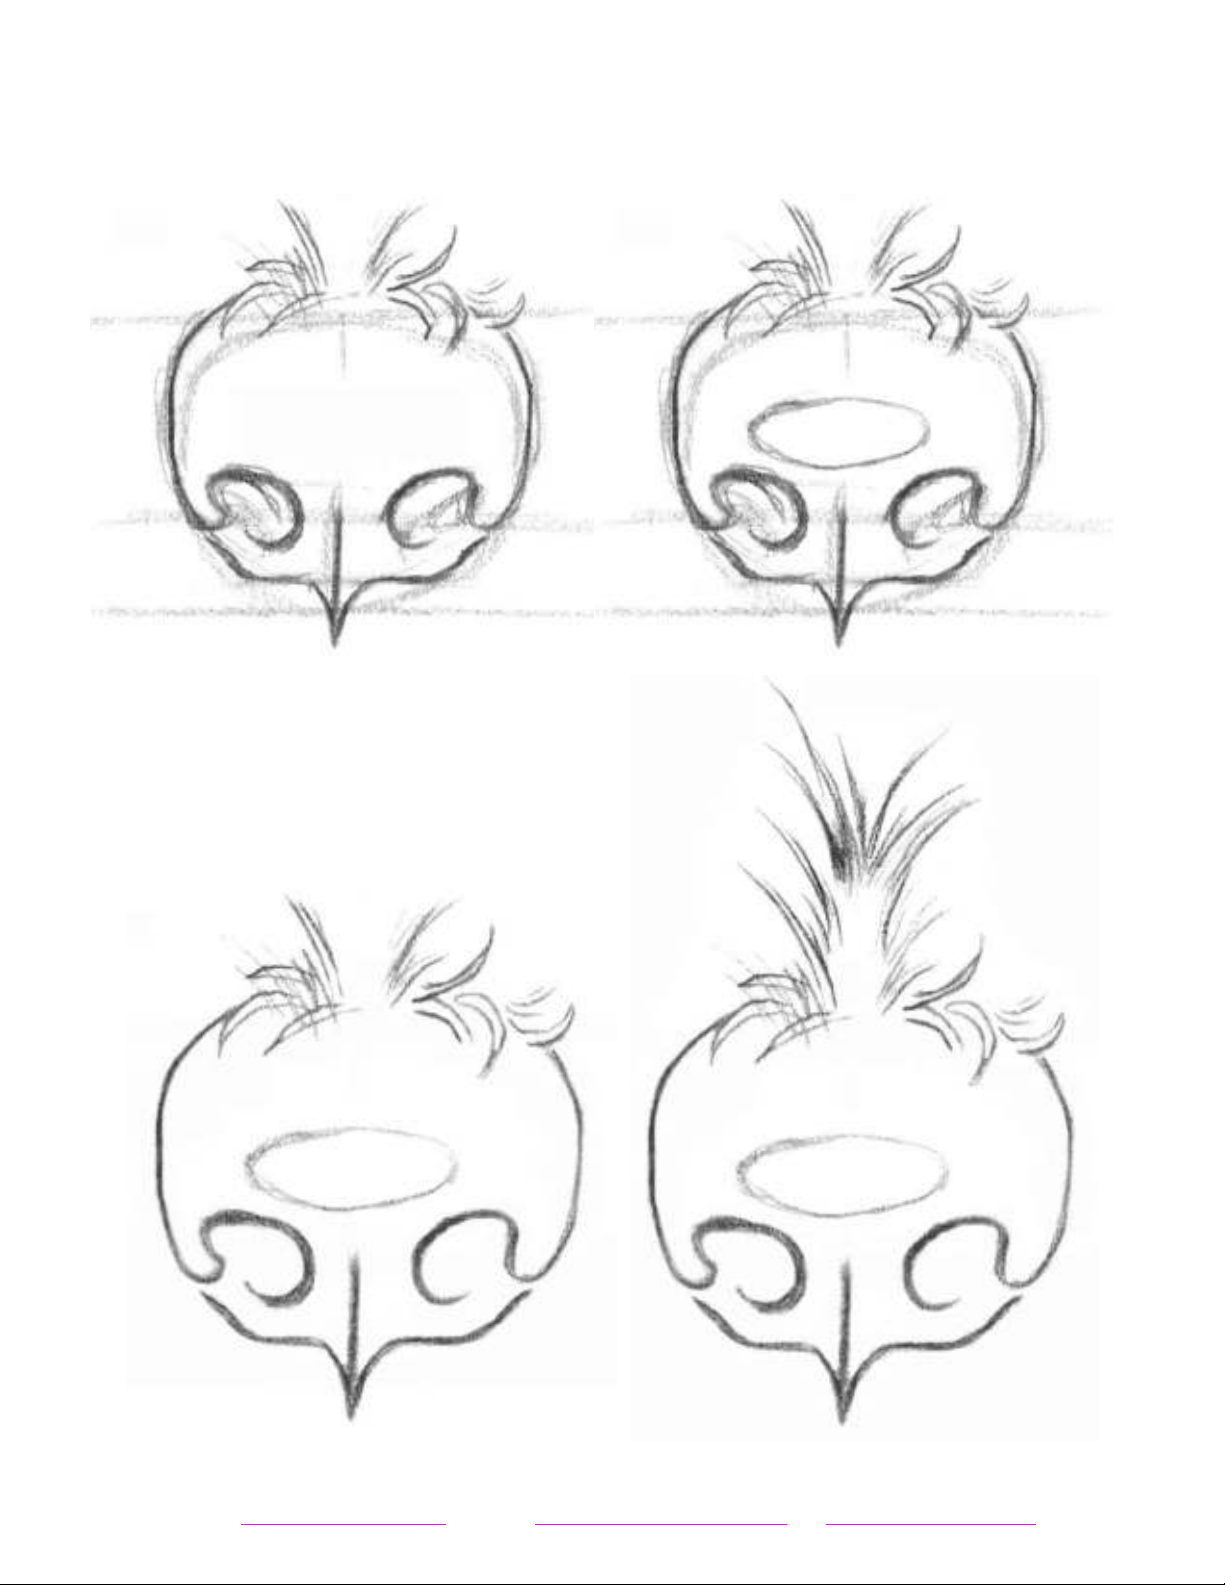
In steps 5 to 15 you outline the nose, and add a few sections of fur above and below it.
STEP 5 STEP 6
The faint lines used to indicate the fur above and below the nose are ragged and uneven, and are
also various lengths and thicknesses.
As you sketch, constantly check the relationships of lines and spaces to one another. Note
whether the sizes and proportions are accurate, and adjust as needed. Pay close attention to the
shapes created by the spaces.
STEP 7 STEP 8
As you complete each step, compare your drawing to mine to make sure you haven’t missed
something. If you’re not happy with some of the lines you draw, simply erase that section,
redraw the lines, and keep on going.
Copyright to all articles, images, text, projects, lessons and exercises within this drawing class belong to Brenda Hoddinott and may
not be reproduced or used for any commercial purposes whatsoever without the written permission of Brenda Hoddinott.
E-mail bhoddinott@hoddinott.com Web sites http://www.finearteducation.com and http://www.drawspace.com
-4 -
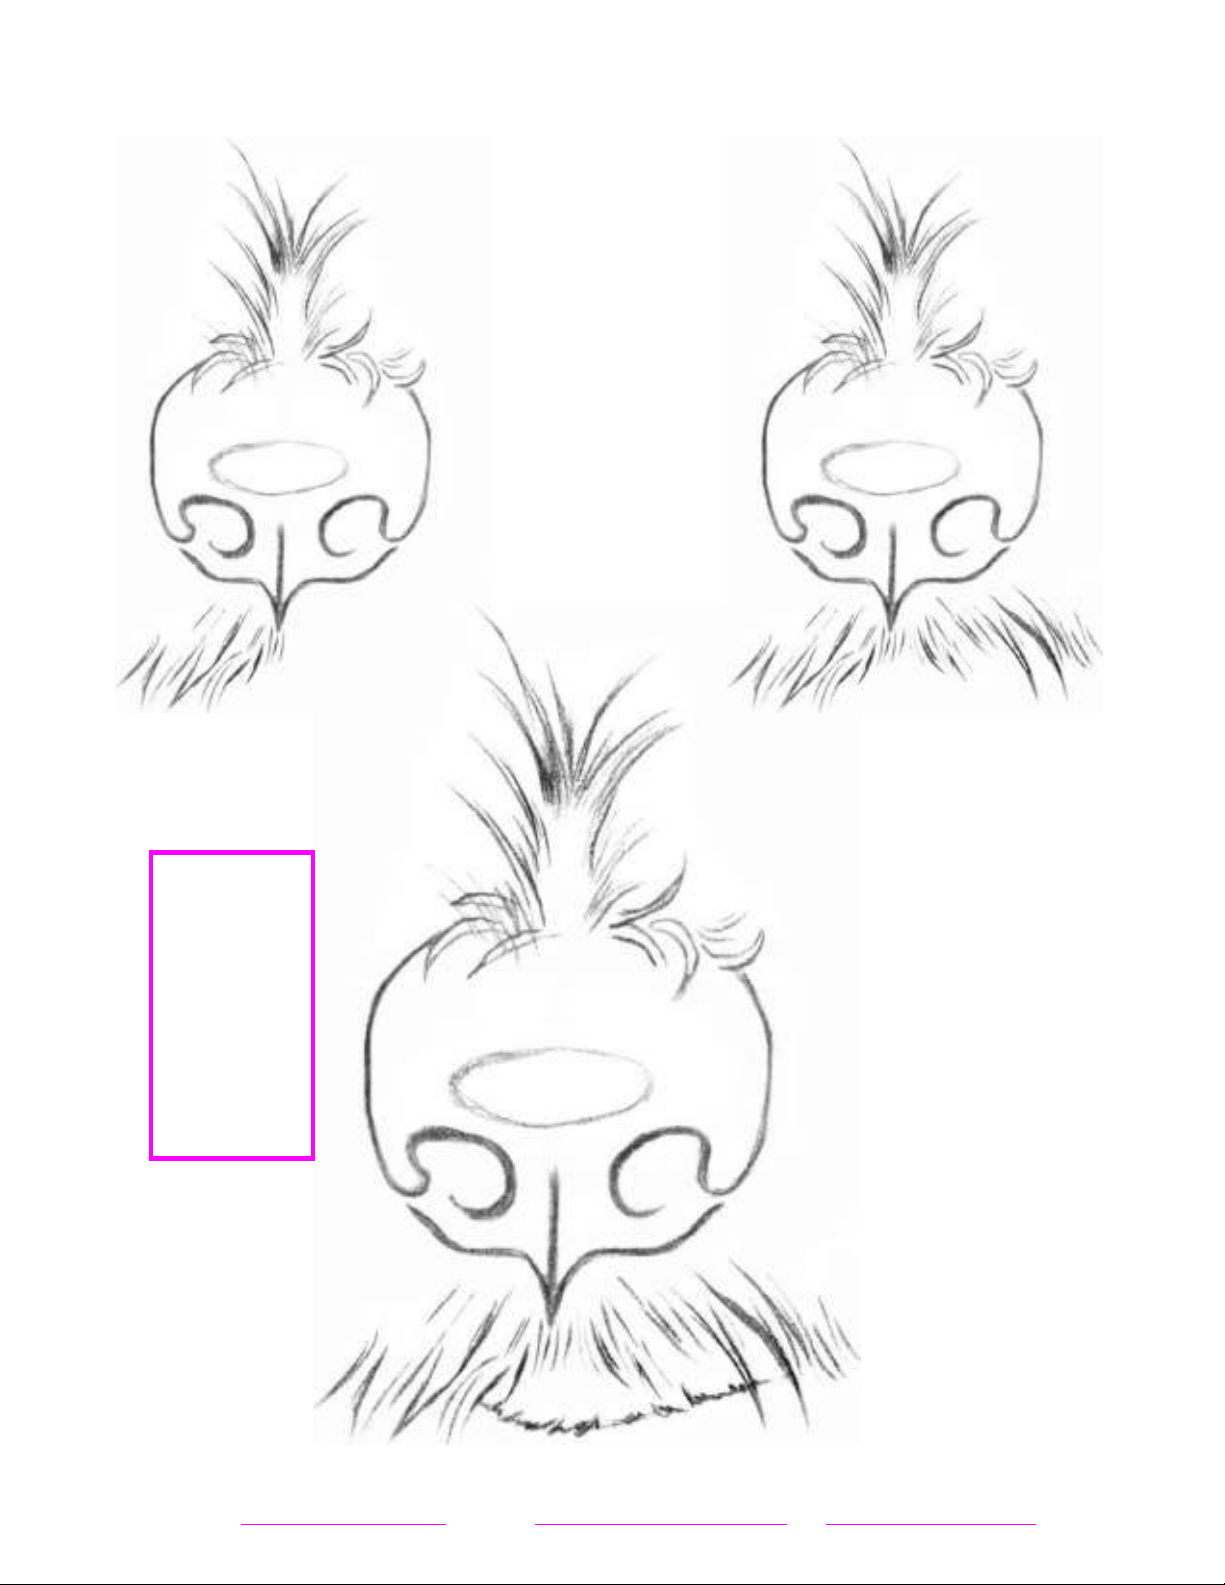
STEP 9 STEP 10
STEP 12
A kneaded eraser works well for erasing rough
sketch lines.
STEP 11
Copyright to all articles, images, text, projects, lessons and exercises within this drawing class belong to Brenda Hoddinott and may
not be reproduced or used for any commercial purposes whatsoever without the written permission of Brenda Hoddinott.
E-mail bhoddinott@hoddinott.com Web sites http://www.finearteducation.com and http://www.drawspace.com
-5 -
STEP 13 STEP 14
Draw slowly! Accuracy is
more important than speed.
Your speed will
automatically improve the
more you practice.
Don’t forget that you can
turn your sketchbook
around as you draw.
STEP 15
Always place a piece of
clean paper under your
hand as you draw.
Each time you work on
a new section,
remember to move your
paper so it’s always
under your hand.
This prevents you from
smudging your
drawing, and protects
the paper from the oils
in your skin.
Remember,
learning to
see as an
artist is the
very
foundation
of
drawing.


![Đề cương bài giảng Mỹ thuật đại cương [mới nhất]](https://cdn.tailieu.vn/images/document/thumbnail/2025/20250715/kimphuong1001/135x160/30821752564027.jpg)