The first you open the picture below:
Use Elliptical Marquee Tool to make a selection with Feather=10px like this:
Press Shift+Ctrl+I to inverse the selection Go to Filter -> Blur -> Radial blur, set something like this:
You will get:
Press Ctrl+M to open Curves, set like this:
The picture looks lighter now
Press Ctrl+U, choose Cyans in Edit part and do as shown below
Press Ctrl+J to duplicate layer, continue to open Hue/Saturation, choose Yellow in Edit part
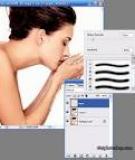
Create a new layer, choose magenta color: #EC008C, zoom out the picture, use soft brush to decorate the lady's lip, change blend mode of layer to Softlight, opacity 80% At this state, the result will look like this
Now we are going to retouch the skin of lady, press Ctrl+B to open Color Balance
You will get:
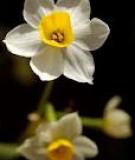
Open the picture below:
Use Elliptical Marquee Tool to make a selection with feather=10px like this
And then move the selection to your work, change blend mode to Screen, opacity=80% Ctrt+J to duplicate layer, you can use Free Transform tool to resize it
Cut fishes out and then move them to your work as shown below:
Continue to open these pictures, move them to your work then change blend mode to Softlight, opacity=40% You can use Layer mask or brush to remove texture's parts over the model
Use pentool to make a curve like this:
Hit right click, choose Stroke path (remember to set the size of brush is 1)
Set Outer Glow of layer curve
Duplicate layer curve 2,3 times, you will get:
Create a new layer, use brush 3-9 px to make some circles in your work like this:
Shift+Ctrl+E to merge all layers then press Ctrl+J to duplicate layer Go to Filter -> Blur -> Gaussian blur
Select "layer copy", change its blend mode to Softlight and opacity=50% And you get the final result:

