
7.1. Introducing Automator
Automator, like most programs on your Mac, sits waiting in your Applications folder.
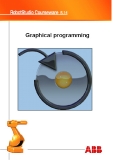
Double-click Automator's icon to open it for the first time (Figure 7-2).
Figure 7-2. Automator's icon is a computer generated robot image named Otto. (Get
it? Otto Matic? Stop, you're killing us!) The icon is supposed to evoke an image of
Automator as a servile program, executing your every desire without question. Any
similarity to the malevolent androids of I, Robot is purely coincidental.
7.1.1. Navigating the Screen
As shown in Figure 7-3, Automator looks confusing. But once you learn what the
different sections do, the layout makes a lot of sense. Here's a run-down of Automator's
various parts.
7.1.1.1. Starting Points menu
When you first launch Automator, you're greeted with a new, ultra-simple Starting Points
menu. It's an easy launching pad for certain kinds of common workflows— those that
work with Files & Folders, Music & Audio, Photos & Images, or Text.
Figure 7-3. In many ways, Automator's interface resembles that of iTunes; the
unified theme, the Play button, and even the Library list are all here. The process of
working in Automator always flows from left to right. Click the type of data you
want to control (Library list), find what you want it to do (Actions list), and drag it
into the Workflow pane to build the list of steps you want your software robot to
take.
When you click the appropriate icon, make selections from the two pop-up menus
beneath it, and click Choose, Automator sets up the beginning of your workflow
automatically. Your workflow isn't complete, not by a long shot; all you've done so far is

to say, "Work with this kind of file, and specify which ones. "You still have to say what
you want done with those files.
Still, you've gotten started.
Of course, if you're a workflow wiz and don't want a jump-start on your project because
you're just that good, selecting Custom gives you a clean, action-free document to work
with. But even if you are an automating expert, the Starting Points menu is almost always
useful. It still saves you those few extra clicks—selecting your base actions, dragging
them to the Workflow pane, setting their preferences, and so on— necessary to get your
workflow started.
Besides, you don't have to tell anyone you used it.
Tip: You can disable the Starting Points menu entirely by clicking Automator
Disable Starting Points.
7.1.1.2. Toolbar
At the top of the Automator window, the toolbar offers five fairly self-explanatory
buttons. From left to right (Figure 7-3):
• Hide Library.This button hides the entire left Library pane of Automator, where all
of the prefab building-block steps are listed. You wind up with one big Workflow
pane.
• Media. Click to open the standard Media Browser box that pops up all over Mac
OSX. You can drag your music, photos, or movies from the Media Browser
directly into the Workflow pane, or into an action itself (one with a matching data
type, of course), to use that media in your workflow.
Tip: Media from the Media Browser isn't all you can add to Automator. You can
also drag files—text documents, media, folders, and so on—straight from the
Finder into your workflow, saving you the hassle of having to search for them in
Automator.
• Record. Click to enter Watch Me mode, where Automator memorizes the steps
that you perform manually (Section 7.3.2).

• Workflow control. Run and Stop "play back" and stop the workflow you're
building.
Tip: To save screen space, you can hide the entire Automator toolbar by choosing View
Toolbar, or by clicking the capsule-shaped button in the upper-right corner of the
window. (You can bring the toolbar back by choosing View Show Toolbar or
clicking the pill button again.)While the toolbar is hidden (and even when it's visible),
you can still start and stop playback by choosing Workflow Run ( -R) and
Workflow Stop ( -period).
7.1.1.3. Library pane
The Library pane is the entire left section of the Automator window. It includes the
Search box, Library list, Description field, and the list of Actions or Variables list. All of
these are described below.
Tip: You can resize either of Automator's left-side columns (Library and Actions) by
carefully dragging the vertical divider lines between them.
7.1.1.4. Search box
Like Mac OSX's other Search boxes, this one works in real time — it displays matching
actions or variables as you type.
If you start by selecting a folder in the Library list at the left, you're telling Automator,
"Search only within this folder of actions or variables. " If you want to search for actions
that can process files in the Finder, for example, click Files & Folders in the Library list,
and then type file in the Search box.
Tip: You can -click to select several folders and then search all of them
simultaneously.Or, to search all of Automator's folders, click Library at the top of the
Library list before searching. (That's the best way to find an action or variable if you're
not sure what folder it's in.)

Your search results appear in the Actions/Variables list, ranked by relevance to your
search terms. You can begin dragging actions directly into the Workflow pane at the right
side to build a workflow, as described shortly.
Click the button in the Search box to return to the complete list of actions or
variables.
7.1.1.5. Library
Above the Library list, two buttons appear that govern what's displayed in the Library
pane:
• Actions. When you click Actions, the Library lists all the features and data on your
Mac that Automator actions can control: Files & Folders, Music, Photos, Text, and
so on. When you click a folder, the Actions list on the right shows you every
action related to that type of data. For example, when you click Photos in the left-
side list, the right-side list of actions offers steps like Flip Images, Crop Images,
and so on.
• When you find an action you want to use in your workflow, you drag it to the right
into the large Workflow pane.
• Variables.New to Automator in Leopard, variables are memorized info chunks that
you can reuse in an Automator workflow, exactly as in real programming
languages. The Variables list is divided into categories like Date & Time (today's
date, today's month, etc.), Locations (the paths to various folders on your Mac),
User (your name, phone number, etc.), and so on.
To see all the available Automator actions or variables on your Mac, click Library
in the Library list.
Later in this chapter, you'll see how it's useful to incorporate these information
tidbits into your workflows.
Note: Variables whose icons look like a boxed V are variables that you can change. For
example, you can change the formatting of the "Current time" variable by double-clicking
it.Variables with icons are predefined and unchangeable.
7.1.1.6. Description field
When you click an action or variable in the list, the Description box provides some terse,
superficial information on how to use it. You might see what the action does, what kind

of data it expects to receive from the previous action (input), and what the action sends
on to the following action (result).
If the variable is editable (it has a V icon), you get to see what parts of it you can change.
Tip: To save space, you can hide the Description field by clicking the button on the
bottom edge of the window. Click it again to bring the Description field back.
7.1.1.7. The button
The button in the lower-left corner of the window is a pop-up menu. Its four
commands let you create and delete customizable collections called groups and smart
groups. They behave exactly like playlists and smart playlists in iTunes:
• Groups. Groups are customizable folders you add to the Library list. To add an
action or variable to a group, drag it from the list onto the Group folder.
• SmartGroups. Smart groups, new in Leopard, are constantly updated with actions
that match the criteria you set for that smart group. (They're available only for
actions, not variables.)
For example, you can create a smart group that lists only actions that work with
iPhoto, or actions with Input Types that contain the word "image." Add more
criteria by clicking the + button.
Tip: Automator's Library list comes with three factory-installed smart groups: Most
Relevant, which displays all the actions relevant to the action you have selected in the
Workflow pane; Most Used, which displays the actions you've used the most in your
workflows; and Recently Added, which displays actions added by newly installed
applications, for example, or actions you downloaded and added yourself.
7.1.1.8. Workflow pane
The Workflow pane is Automator's kitchen. It's where you put your actions in whatever
order you want, set any action-specific preferences, and fry them all up in a pan.
But the Workflow pane is also where you see how the information from one action gets
piped into another, creating a stream of information. That's how the Workflow pane

![Robots.txt: Những điều cần biết [A-Z cho SEO 2024]](https://cdn.tailieu.vn/images/document/thumbnail/2011/20110331/davidvilla2425/135x160/robots_2902.jpg)


%20--%3e%3cdefs%3e%3cstyle%3e%20.st0%20{%20fill:%20%23fff;%20}%20.st1%20{%20fill:%20%237800fa;%20}%20%3c/style%3e%3c/defs%3e%3cpath%20class='st1'%20d='M117.78,12.18H43.11c2.9,3.47,4.65,7.94,4.65,12.82,0,5.6-2.3,10.66-6.01,14.29h76.02l7.22-13.56-7.22-13.56Z'/%3e%3cg%3e%3cpath%20class='st0'%20d='M53.58,26.17h-.59v-1.46h.59v-4.96h2.83c1.78,0,2.67.94,2.67,2.82v5.76c0,1.87-.89,2.81-2.67,2.81h-2.83v-4.96ZM55.36,21.37v3.34h1.1v1.46h-1.1v3.34h1.01c.61,0,.91-.37.91-1.1v-5.93c0-.74-.3-1.1-.91-1.1h-1.01Z'/%3e%3cpath%20class='st0'%20d='M65.99,31.14h-1.8l-.31-2.07h-2.19l-.31,2.07h-1.64l1.82-11.39h2.62l1.82,11.39ZM65.28,18.04c-.25.46-.51.77-.75.94-.21.15-.47.22-.79.22-.26,0-.57-.07-.92-.22l-.38-.15c-.14-.05-.26-.07-.37-.07-.3,0-.53.18-.71.54l-.91-.68c.25-.46.51-.77.75-.94.21-.14.48-.21.79-.21.26,0,.57.07.92.21l.38.15c.14.05.26.07.37.07.3,0,.53-.18.71-.54l.91.68ZM61.91,27.52h1.73l-.87-5.76-.87,5.76Z'/%3e%3cpath%20class='st0'%20d='M74.53,26.89v1.52c0,1.91-.89,2.86-2.67,2.86s-2.67-.95-2.67-2.86v-5.93c0-1.91.89-2.86,2.67-2.86s2.67.95,2.67,2.86v1.11h-1.69v-1.22c0-.75-.31-1.12-.93-1.12s-.93.37-.93,1.12v6.15c0,.74.31,1.11.93,1.11s.93-.37.93-1.11v-1.63h1.69Z'/%3e%3cpath%20class='st0'%20d='M81.4,31.14h-1.8l-.31-2.07h-2.19l-.31,2.07h-1.64l1.82-11.39h2.62l1.82,11.39ZM75.9,19.2l1.52-1.91h1.71l1.51,1.91h-1.61l-.76-.95-.75.95h-1.61ZM77.32,27.52h1.73l-.87-5.76-.87,5.76ZM83.1,15.99l-1.76,1.91h-1.26l1.17-1.91h1.86Z'/%3e%3cpath%20class='st0'%20d='M84.86,19.75c1.78,0,2.67.94,2.67,2.82v1.48c0,1.87-.89,2.81-2.67,2.81h-.85v4.28h-1.79v-11.39h2.64ZM84.01,21.37v3.86h.85c.58,0,.87-.36.87-1.08v-1.71c0-.71-.29-1.07-.87-1.07h-.85Z'/%3e%3cpath%20class='st0'%20d='M93.51,19.75c1.78,0,2.67.94,2.67,2.82v1.48c0,1.87-.89,2.81-2.67,2.81h-.85v4.28h-1.79v-11.39h2.64ZM92.66,21.37v3.86h.85c.58,0,.87-.36.87-1.08v-1.71c0-.71-.29-1.07-.87-1.07h-.85Z'/%3e%3cpath%20class='st0'%20d='M98.8,31.14h-1.79v-11.39h1.79v4.88h2.03v-4.88h1.83v11.39h-1.83v-4.88h-2.03v4.88Z'/%3e%3cpath%20class='st0'%20d='M105.36,24.55h2.46v1.62h-2.46v3.34h3.09v1.63h-4.88v-11.39h4.88v1.63h-3.09v3.18ZM108.17,17.29l-1.76,1.91h-1.26l1.17-1.91h1.86Z'/%3e%3cpath%20class='st0'%20d='M112.2,19.75c1.78,0,2.67.94,2.67,2.82v1.48c0,1.87-.89,2.81-2.67,2.81h-.85v4.28h-1.79v-11.39h2.64ZM111.35,21.37v3.86h.85c.58,0,.87-.36.87-1.08v-1.71c0-.71-.29-1.07-.87-1.07h-.85Z'/%3e%3c/g%3e%3ccircle%20class='st1'%20cx='25'%20cy='25'%20r='20'/%3e%3cpath%20class='st0'%20d='M32.78,19.27c2.92,0,4.43,2.55,5.28,5.33l.71,2.17c.14.38-.33.75-.71.75h-5.61c.19-.33.24-.71.09-1.08l-.75-2.45c-.43-1.32-.99-2.64-1.79-3.77.75-.57,1.65-.94,2.78-.94h0ZM25,18.38c3.25,0,4.9,2.78,5.89,5.89l.76,2.45c.14.42-.33.8-.8.8h-11.69c-.42,0-.94-.38-.8-.8l.75-2.45c.99-3.11,2.64-5.89,5.89-5.89h0ZM25,11.35c1.74,0,3.11,1.37,3.11,3.11s-1.37,3.11-3.11,3.11-3.11-1.41-3.11-3.11,1.41-3.11,3.11-3.11h0ZM17.27,19.27c1.08,0,1.98.38,2.73.94-.8,1.13-1.37,2.45-1.74,3.77l-.8,2.45c-.14.38-.05.75.09,1.08h-5.56c-.42,0-.9-.38-.75-.75l.71-2.17c.9-2.78,2.41-5.33,5.33-5.33h0ZM17.27,12.91c1.51,0,2.78,1.27,2.78,2.83s-1.27,2.83-2.78,2.83-2.83-1.27-2.83-2.83,1.27-2.83,2.83-2.83h0ZM32.78,12.91c1.56,0,2.78,1.27,2.78,2.83s-1.23,2.83-2.78,2.83-2.83-1.27-2.83-2.83,1.27-2.83,2.83-2.83h0ZM27.07,28.56v.09c0,.57-.24,1.08-.61,1.46h0v.05c-.38.33-.9.57-1.46.57s-1.08-.24-1.46-.61h0c-.38-.38-.61-.9-.61-1.46v-.09h1.41v.09c0,.19.05.38.19.47v.05c.09.09.28.19.47.19s.38-.09.47-.19v-.05c.14-.09.24-.28.24-.47t-.05-.09h1.41ZM30.99,28.56v.09c0,1.65-.66,3.16-1.74,4.24-1.08,1.08-2.59,1.79-4.24,1.79s-3.16-.71-4.24-1.79l-.05-.05c-1.04-1.08-1.7-2.55-1.7-4.2v-.09h1.41v.09c0,1.27.47,2.4,1.27,3.25h.05c.85.85,1.98,1.37,3.25,1.37s2.4-.52,3.25-1.37c.85-.8,1.37-1.98,1.37-3.25v-.09h1.37ZM34.99,28.56v.09c0,2.78-1.13,5.28-2.92,7.07-1.79,1.79-4.29,2.92-7.07,2.92s-5.23-1.13-7.07-2.92c-1.79-1.79-2.92-4.29-2.92-7.07v-.09h1.41v.09c0,2.4.94,4.53,2.5,6.08,1.56,1.56,3.72,2.5,6.08,2.5s4.52-.94,6.08-2.5c1.56-1.56,2.5-3.68,2.5-6.08v-.09h1.41Z'/%3e%3c/svg%3e)