
26
essential skills: photoshop CS3
File formats
Format Compression Color modes Layers Transparency Uses
RAW No Unprocessed No No Master file
JPEG Yes RGB, CMYK,
Grayscale No No Internet and camera
format (compressed)
JPEG2000 Yes RGB, CMYK,
Grayscale No No Internet and archival
Photoshop No RGB, CMYK,
Grayscale, Indexed
color Yes Yes Master file
(modified)
TIFF Yes RGB, CMYK,
Grayscale Yes Yes Commercial printing
and generic camera
format (lossless)
GIF Yes Indexed color No Yes Internet graphics and
animations
DNG Yes Unprocessed No No Archival format for
storing original RAW
and metadata
JPEG2000 – This version of the JPEG format supports 16 Bits/Channel and alpha channels
and produces less image artifacts than the standard JPEG compression but uses a more complex
list of saving options than the standard JPEG format. Photoshop CS3 supports the file format
but it is not available as part of the ‘Save for Web’ options.
PSD (Photoshop Document) – This is the default format used by the Adobe image-editing
software. A Photoshop document is usually kept as the master file from which all other files
are produced depending on the requirements of the output device. The PSB format is another
version of PSD and is designed specifically for creating documents larger than 2GB.
TIFF (Tagged Image File Format) – This has been the industry standard for images destined
for publishing (magazines and books, etc.). TIFF uses a ‘lossless’ compression (no loss of image
data or quality) called ‘LZW compression’. Although preserving the quality of the image,
LZW compression is only capable of compressing images by a small amount. TIFF files now
support layers and transparency that can be read by other Adobe software products such as
InDesign.
GIF (Graphics Interchange Format) – This format is used for logos and images with a small
number of colors and is very popular with web professionals. It is capable of storing up to 256
colors, animation and areas of transparency. It is not generally used for photographic images.
DNG (Digital Negative Format) – The DNG format is a new archival file format that stores
both the RAW picture data as well as the metadata saved by the camera at the time of shooting.
27
digital basics
;67;07:MVYJYVZZWSH[MVYTZH]PUNMany work and education environments contain a mix of Windows and Macintosh
machines. Though both systems are far better at reading each other’s files than they
used to be, there are still occasions when you will have trouble when sharing files
between the two platforms. Use these tips to ensure that work that you save is available
for use in both environments.
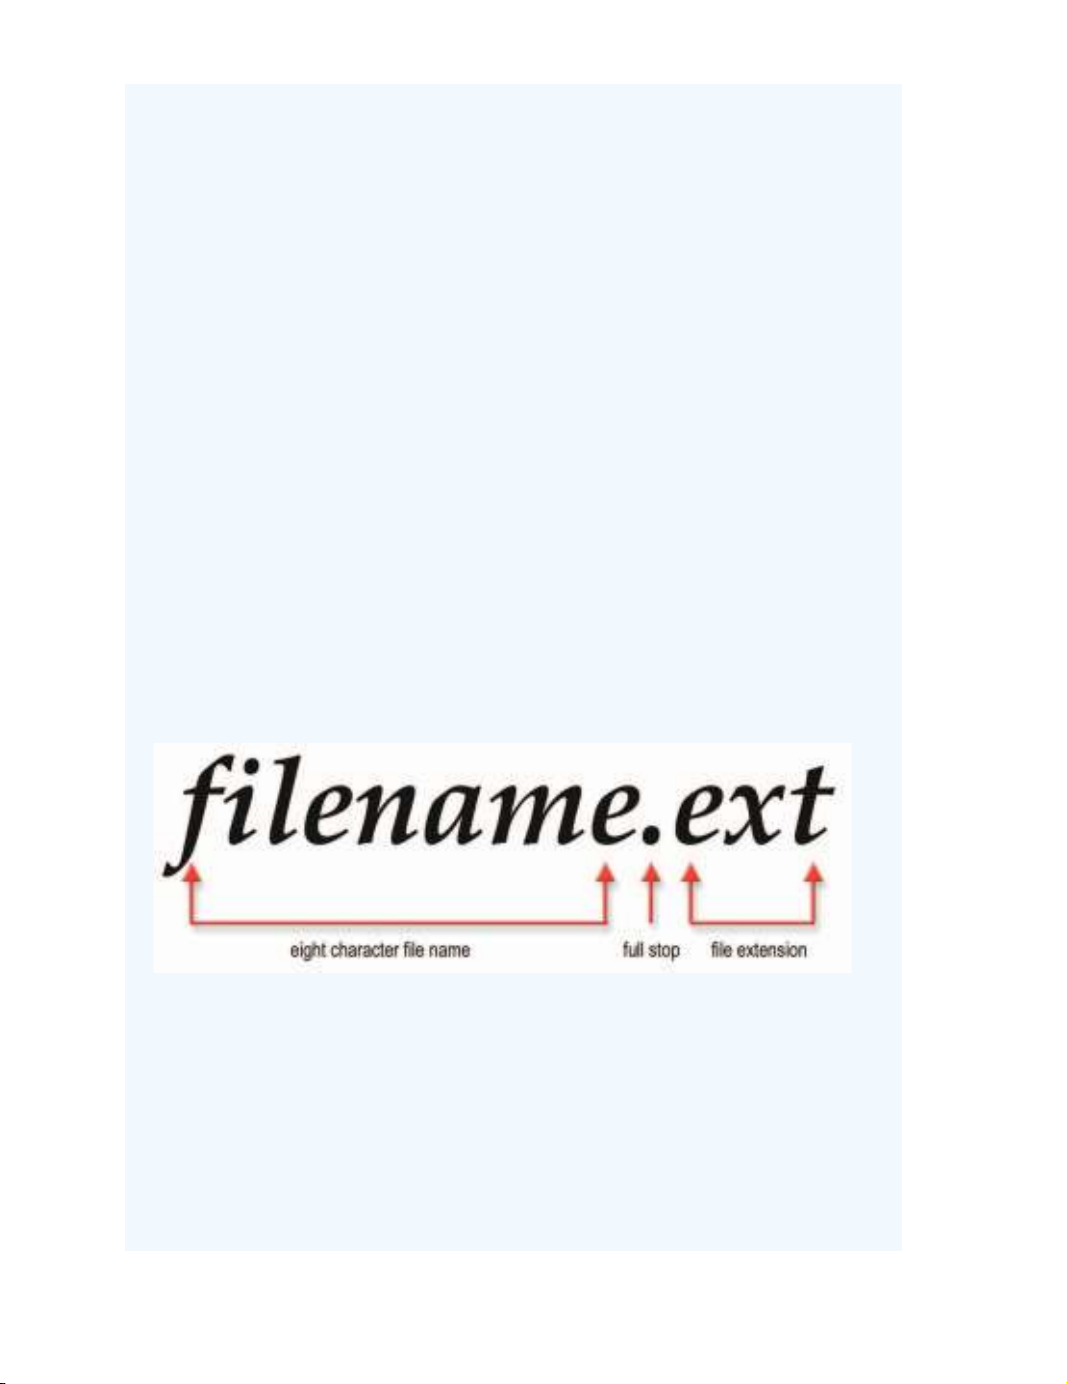
1. Make sure that you always append your file names.
This means add the three-letter abbreviation of the file format you are using after the
name. So if you were saving a file named ‘Image1’ as a TIFF the saved file would be
‘Image1.tif’, a JPEG version would be ‘Image1.jpg’ and a Photoshop file would be
‘Image1.psd’. Macintosh Photoshop users can force the program to ‘Always Append’ by
selecting this option in the ‘Saving Files’ section of Preferences.
2. Save TIFF files in the IBM version.
When saving TIFF files you are prompted to choose which platform you prefer to work
with; choose IBM if you want to share files. Macintosh machines can generally read
IBM (Windows) TIFFs, but the same is not true the other way around.
3. Macintosh users save images to be shared on Windows formatted disks.
If you are sharing images on a portable storage disk such as a Zip drive always use
media that are formatted for Windows. Macintosh drives can usually read the Windows
disks but Windows machines can’t read the Macintosh versions.
4. Try to keep file names to eight characters or less and don’t use spaces.
Older Windows machines and some web servers have difficulty reading file names
longer than eight characters. So just in case you happen to be trying to share with
a cantankerous old machine get into the habit of using short names – and always
appended of course. Use a hyphen or underscore instead of a space and use lower case
characters only (no capitals) if the images are destined for a web server that likes to say
‘no’.

28
essential skills: photoshop CS3
There is no doubt that if you want to save space and maintain the absolute quality of
the image then the only choice is the lossless system. A good example of this would be
photographers, or illustrators, archiving original pictures. The integrity of the image in this
circumstance is more important than the extra space it takes to store it.
On the other hand (no matter how much it goes against the grain), sometimes the
circumstances dictate the need for smaller file sizes even if some image quality is lost along the
way. Initially you might think that any system that degrades the image is not worth using, and
in most circumstances, I would have to agree with you. But sometimes the image quality and
the file size have to be balanced. In the case of images on the web they need to be incredibly
small so that they can be transmitted quickly over slow telephone lines. Here some loss in
quality is preferable to images that take 4 or 5 minutes to appear on the page. This said, I
always store images in a lossless format on my own computer and only use a lossy format
when it is absolutely crucial to do so.
What is compression?
All digital picture files store information about the color, brightness and position of the pixels
that make up the image. Compression systems reorder and rationalize the way in which this
information is stored. The result is a file that is optimized and therefore reduced in size. Large
space savings can be made by identifying patterns of color, texture and brightness within
images and storing these patterns once, and then simply referencing them for the rest of the
image. This pattern recognition and file optimization is known as compression.
The compression and decompression process, or CODEC, contains three stages:
1. The original image is compressed using an algorithm to optimize the file.
2. This version of the file becomes the one that is stored on your hard drive or web site.
3. The compressed file is decompressed ready for viewing or editing.
If the decompressed file is exactly the same as the original after decompression, then the
process is called ‘lossless’. If some image information is lost along the way then it is said to be
‘lossy’. Lossless systems typically can reduce files to about 60% of their original size, whereas
lossy compression can reduce images to less than 1%.
0THNLJVTWYLZZPVUImaging files are huge. This is especially noticeable when you compare them with other digital
files such as those used for word processing. A text document that is 100 pages long can easily be
less than 1% the size of a file that contains a single 8 × 10 inch digital photograph. With files this
large it soon became obvious to the industry that some form of compression was needed to help
alleviate the need for us photographers to be continuously buying bigger and bigger hard drives.
What emerged was two different ways to compress pictures. Each enables you to squeeze large
image files into smaller spaces but one system does this with no loss of picture quality – lossless
compression – whereas the other enables greater space savings with the price of losing some of
your image's detail – lossy compression.
29
digital basics
Format Compression
amount
Original
fi le size
Compressed
fi le size
Lossy/
Lossless
JPEG Minimum
20.0MB
(PSD fi le)
0.14MB Lossy
JPEG Maximum 2.86MB Lossy
JPEG2000 Minimum 0.07MB Lossy
JPEG2000 Maximum 2.54MB Lossy
JPEG2000 – 5.40MB Lossless
TIFF LZW 10.30MB Lossless
TIFF Zip 10.10MB Lossless
TIFF None 27.30MB Lossless
PSD – 20.00MB Lossless
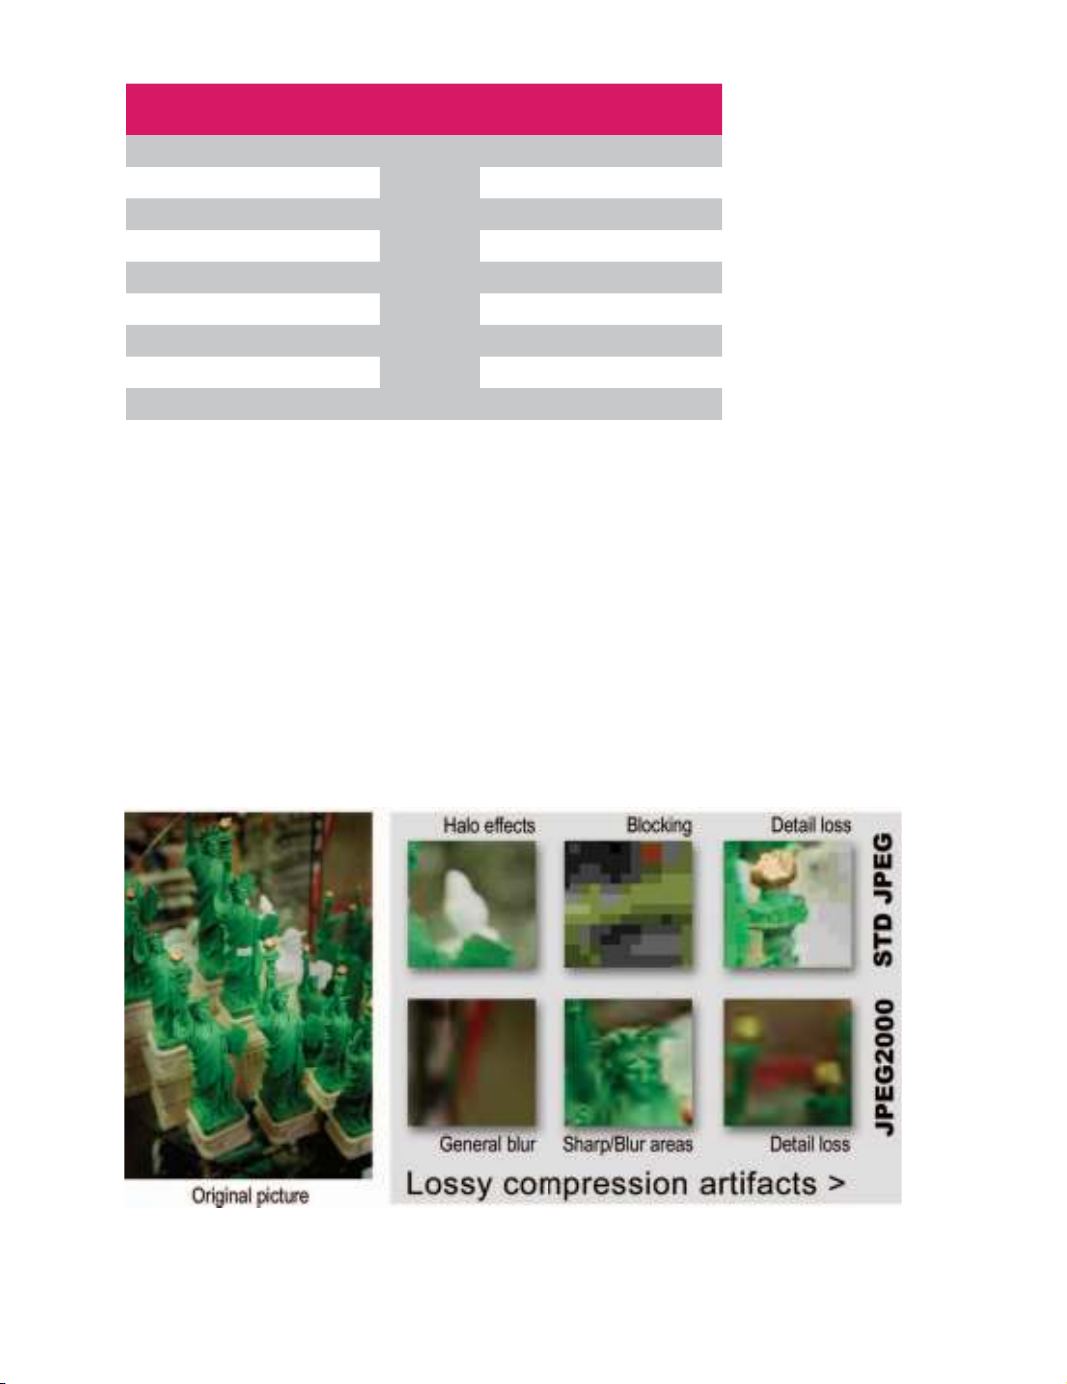
/V^SVZZ`PZSVZZ`&Th e term lossy means that some of the image’s quality is lost in the compression process. Th e amount
and type of compression used determines the look of the end result. Standard JPEG and JPEG2000
display diff erent types of ‘artifacts’ or areas where compression is apparent. Th e level of acceptable
artifacts and practical fi le sizes will depend on the required outcome for the picture.
To help ensure that you have the best balance of fi le size and image quality make sure that you:
Use the Save for Web or Save As > JPEG2000 features – both contain a post-compression t
preview option.
Always examine the compressed image at a magnifi cation of 100% or greater so that t
unacceptable artifacts will be obvious.
Comparing the
compression abilities
of diff erent fi le types
and settings using the
same 20MB base fi le
Typical artifacts resulting from applying too much compression to a photo
30
essential skills: photoshop CS3
Resolution
Resolution is a term that is used to specify the size of a pixel, a dot of colored light on a monitor
or a dot of ink on the printed page. Th ere are usually two resolutions at play at any one time –
the resolution of the digital fi le and that of the output device. We can talk about capture size,
image resolution, monitor resolution and printer resolution. Th ey are all diff erent, but they all
come into play when handling a single digital image that is to be printed. Various resolutions
can be quoted as we move through the chain of processes involved in creating a digital print (in
the example below the total number of pixels remains constant throughout the chain of events).
:\TTHY`An image captured at a resolution greater than 3000ppi is displayed at 100ppi on a high-resolution
monitor. Using Photoshop, the image resolution is lowered to 256ppi (the pixel dimensions remain
the same). Th e image is then printed using an inkjet printer with a printer resolution of 1440dpi
(dots per inch). Th e diff erent resolutions associated with this chain of events are:
Capture size > Display resolution > Image resolution > Output device resolution
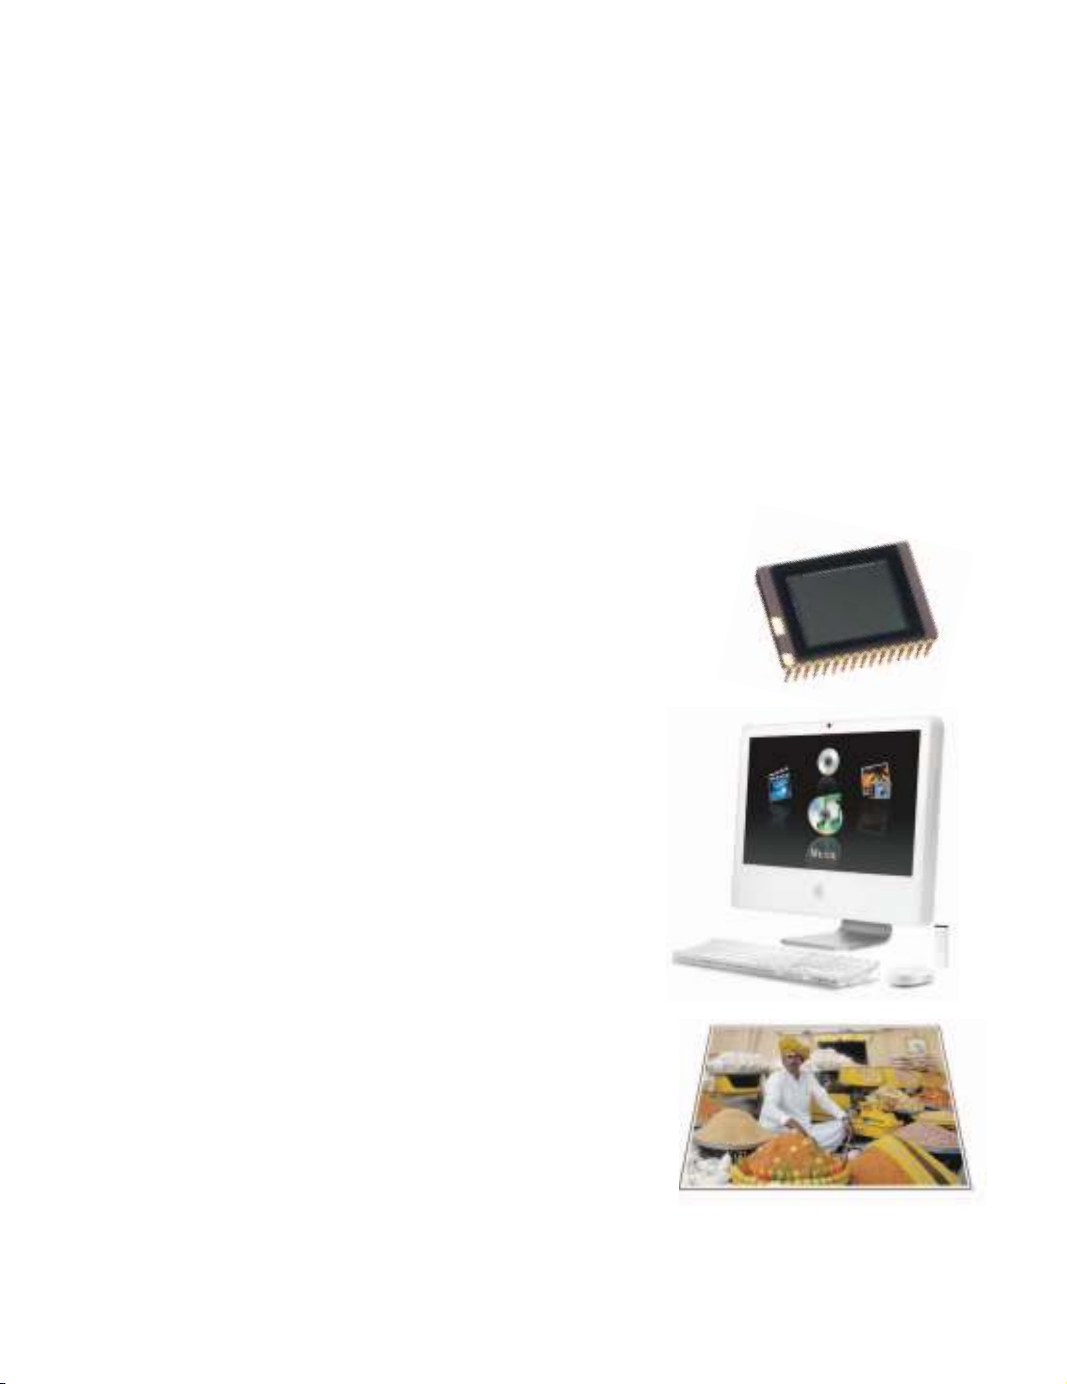
Image sensor
Th e sensor to the right creates an image fi le with 5 million
pixels or 5 megapixels (2560 × 1920 pixels). Th e resolution
assigned to the image fi le by the capture device may be a print
or monitor resolution. Either way it has no bearing on the fi le
size, which is determined by the total number of pixels.
+PNP[HSÄSLKPZWSH`LKVUZJYLLUTh e monitor resolution (the size of its display pixels, e.g. 1024
× 768) is defi ned by its resolution setting (approximately 100
pixels for every linear inch or 10,000 pixels for every square inch
in a high defi nition TFT display). Th e image pixels (diff erent
than the display pixels) can be viewed in a variety of sizes by
zooming in and out of the image using image-editing software.
+PNP[HSÄSLHKQ\Z[LKPU7OV[VZOVWTh e resolution of the digital fi le is adjusted to 256 pixels per
inch (ppi). Each pixel is allocated a size of 1/256th of an inch.
Because the digital fi le is 2560 pixels wide this will create a print
that is 10 inches wide if printed (256 × 10 = 2560).
Note > Increasing the document size further will start to
lower the resolution below an acceptable level (the pixels
will become large enough to see with the naked eye).
;OLPTHNLPZWYPU[LKTh e image is printed on an inkjet printer using a printing resolution of 1440 dots per inch.
Many colored dots of ink are used to render a single image pixel (see ‘Dpi and ppi’).


%20--%3e%3cdefs%3e%3cstyle%3e%20.st0%20{%20fill:%20%23fff;%20}%20.st1%20{%20fill:%20%237800fa;%20}%20%3c/style%3e%3c/defs%3e%3cpath%20class='st1'%20d='M117.78,12.18H43.11c2.9,3.47,4.65,7.94,4.65,12.82,0,5.6-2.3,10.66-6.01,14.29h76.02l7.22-13.56-7.22-13.56Z'/%3e%3cg%3e%3cpath%20class='st0'%20d='M53.58,26.17h-.59v-1.46h.59v-4.96h2.83c1.78,0,2.67.94,2.67,2.82v5.76c0,1.87-.89,2.81-2.67,2.81h-2.83v-4.96ZM55.36,21.37v3.34h1.1v1.46h-1.1v3.34h1.01c.61,0,.91-.37.91-1.1v-5.93c0-.74-.3-1.1-.91-1.1h-1.01Z'/%3e%3cpath%20class='st0'%20d='M65.99,31.14h-1.8l-.31-2.07h-2.19l-.31,2.07h-1.64l1.82-11.39h2.62l1.82,11.39ZM65.28,18.04c-.25.46-.51.77-.75.94-.21.15-.47.22-.79.22-.26,0-.57-.07-.92-.22l-.38-.15c-.14-.05-.26-.07-.37-.07-.3,0-.53.18-.71.54l-.91-.68c.25-.46.51-.77.75-.94.21-.14.48-.21.79-.21.26,0,.57.07.92.21l.38.15c.14.05.26.07.37.07.3,0,.53-.18.71-.54l.91.68ZM61.91,27.52h1.73l-.87-5.76-.87,5.76Z'/%3e%3cpath%20class='st0'%20d='M74.53,26.89v1.52c0,1.91-.89,2.86-2.67,2.86s-2.67-.95-2.67-2.86v-5.93c0-1.91.89-2.86,2.67-2.86s2.67.95,2.67,2.86v1.11h-1.69v-1.22c0-.75-.31-1.12-.93-1.12s-.93.37-.93,1.12v6.15c0,.74.31,1.11.93,1.11s.93-.37.93-1.11v-1.63h1.69Z'/%3e%3cpath%20class='st0'%20d='M81.4,31.14h-1.8l-.31-2.07h-2.19l-.31,2.07h-1.64l1.82-11.39h2.62l1.82,11.39ZM75.9,19.2l1.52-1.91h1.71l1.51,1.91h-1.61l-.76-.95-.75.95h-1.61ZM77.32,27.52h1.73l-.87-5.76-.87,5.76ZM83.1,15.99l-1.76,1.91h-1.26l1.17-1.91h1.86Z'/%3e%3cpath%20class='st0'%20d='M84.86,19.75c1.78,0,2.67.94,2.67,2.82v1.48c0,1.87-.89,2.81-2.67,2.81h-.85v4.28h-1.79v-11.39h2.64ZM84.01,21.37v3.86h.85c.58,0,.87-.36.87-1.08v-1.71c0-.71-.29-1.07-.87-1.07h-.85Z'/%3e%3cpath%20class='st0'%20d='M93.51,19.75c1.78,0,2.67.94,2.67,2.82v1.48c0,1.87-.89,2.81-2.67,2.81h-.85v4.28h-1.79v-11.39h2.64ZM92.66,21.37v3.86h.85c.58,0,.87-.36.87-1.08v-1.71c0-.71-.29-1.07-.87-1.07h-.85Z'/%3e%3cpath%20class='st0'%20d='M98.8,31.14h-1.79v-11.39h1.79v4.88h2.03v-4.88h1.83v11.39h-1.83v-4.88h-2.03v4.88Z'/%3e%3cpath%20class='st0'%20d='M105.36,24.55h2.46v1.62h-2.46v3.34h3.09v1.63h-4.88v-11.39h4.88v1.63h-3.09v3.18ZM108.17,17.29l-1.76,1.91h-1.26l1.17-1.91h1.86Z'/%3e%3cpath%20class='st0'%20d='M112.2,19.75c1.78,0,2.67.94,2.67,2.82v1.48c0,1.87-.89,2.81-2.67,2.81h-.85v4.28h-1.79v-11.39h2.64ZM111.35,21.37v3.86h.85c.58,0,.87-.36.87-1.08v-1.71c0-.71-.29-1.07-.87-1.07h-.85Z'/%3e%3c/g%3e%3ccircle%20class='st1'%20cx='25'%20cy='25'%20r='20'/%3e%3cpath%20class='st0'%20d='M32.78,19.27c2.92,0,4.43,2.55,5.28,5.33l.71,2.17c.14.38-.33.75-.71.75h-5.61c.19-.33.24-.71.09-1.08l-.75-2.45c-.43-1.32-.99-2.64-1.79-3.77.75-.57,1.65-.94,2.78-.94h0ZM25,18.38c3.25,0,4.9,2.78,5.89,5.89l.76,2.45c.14.42-.33.8-.8.8h-11.69c-.42,0-.94-.38-.8-.8l.75-2.45c.99-3.11,2.64-5.89,5.89-5.89h0ZM25,11.35c1.74,0,3.11,1.37,3.11,3.11s-1.37,3.11-3.11,3.11-3.11-1.41-3.11-3.11,1.41-3.11,3.11-3.11h0ZM17.27,19.27c1.08,0,1.98.38,2.73.94-.8,1.13-1.37,2.45-1.74,3.77l-.8,2.45c-.14.38-.05.75.09,1.08h-5.56c-.42,0-.9-.38-.75-.75l.71-2.17c.9-2.78,2.41-5.33,5.33-5.33h0ZM17.27,12.91c1.51,0,2.78,1.27,2.78,2.83s-1.27,2.83-2.78,2.83-2.83-1.27-2.83-2.83,1.27-2.83,2.83-2.83h0ZM32.78,12.91c1.56,0,2.78,1.27,2.78,2.83s-1.23,2.83-2.78,2.83-2.83-1.27-2.83-2.83,1.27-2.83,2.83-2.83h0ZM27.07,28.56v.09c0,.57-.24,1.08-.61,1.46h0v.05c-.38.33-.9.57-1.46.57s-1.08-.24-1.46-.61h0c-.38-.38-.61-.9-.61-1.46v-.09h1.41v.09c0,.19.05.38.19.47v.05c.09.09.28.19.47.19s.38-.09.47-.19v-.05c.14-.09.24-.28.24-.47t-.05-.09h1.41ZM30.99,28.56v.09c0,1.65-.66,3.16-1.74,4.24-1.08,1.08-2.59,1.79-4.24,1.79s-3.16-.71-4.24-1.79l-.05-.05c-1.04-1.08-1.7-2.55-1.7-4.2v-.09h1.41v.09c0,1.27.47,2.4,1.27,3.25h.05c.85.85,1.98,1.37,3.25,1.37s2.4-.52,3.25-1.37c.85-.8,1.37-1.98,1.37-3.25v-.09h1.37ZM34.99,28.56v.09c0,2.78-1.13,5.28-2.92,7.07-1.79,1.79-4.29,2.92-7.07,2.92s-5.23-1.13-7.07-2.92c-1.79-1.79-2.92-4.29-2.92-7.07v-.09h1.41v.09c0,2.4.94,4.53,2.5,6.08,1.56,1.56,3.72,2.5,6.08,2.5s4.52-.94,6.08-2.5c1.56-1.56,2.5-3.68,2.5-6.08v-.09h1.41Z'/%3e%3c/svg%3e)