
The Property inspector
We have been mentioning this panel quite a bit to this point, and now would be a good
time to stroll over to it and take a closer look.
The Property inspector is designed to make your life easy. When you select something on
the stage, or select the stage itself, the panel will update to reflect the properties that can
be changed in regard to what was just selected (see Figure 1-9). As you become more pro-
ficient and comfortable with Flash, this panel will become an indispensable aid to your
workflow.
The panel is positioned, by default, at the bottom of the screen. You can move it elsewhere
on the screen by simply dragging it into position and releasing the mouse. There are loca-
tions on the screen where you will see a shadow or darkening of the location when the
panel is over it. This color change indicates that the panel can be docked into that location.
Otherwise, the panel will “float” above the screen.
Figure 1-9. The Property inspector
When an object is placed on the stage and selected, the Property inspector will change to
reflect the properties of that object that can be manipulated. For example, in Figure 1-10,
abox has been drawn on the stage. The Property inspector shows you the type of object
that has been selected and tells you the stroke and the fill color of the object can also be
changed. As well, you can change how scaling will be applied to the object and the treat-
ment of the red stroke around the box.
FOUNDATION FLASH CS3 FOR DESIGNERS
12
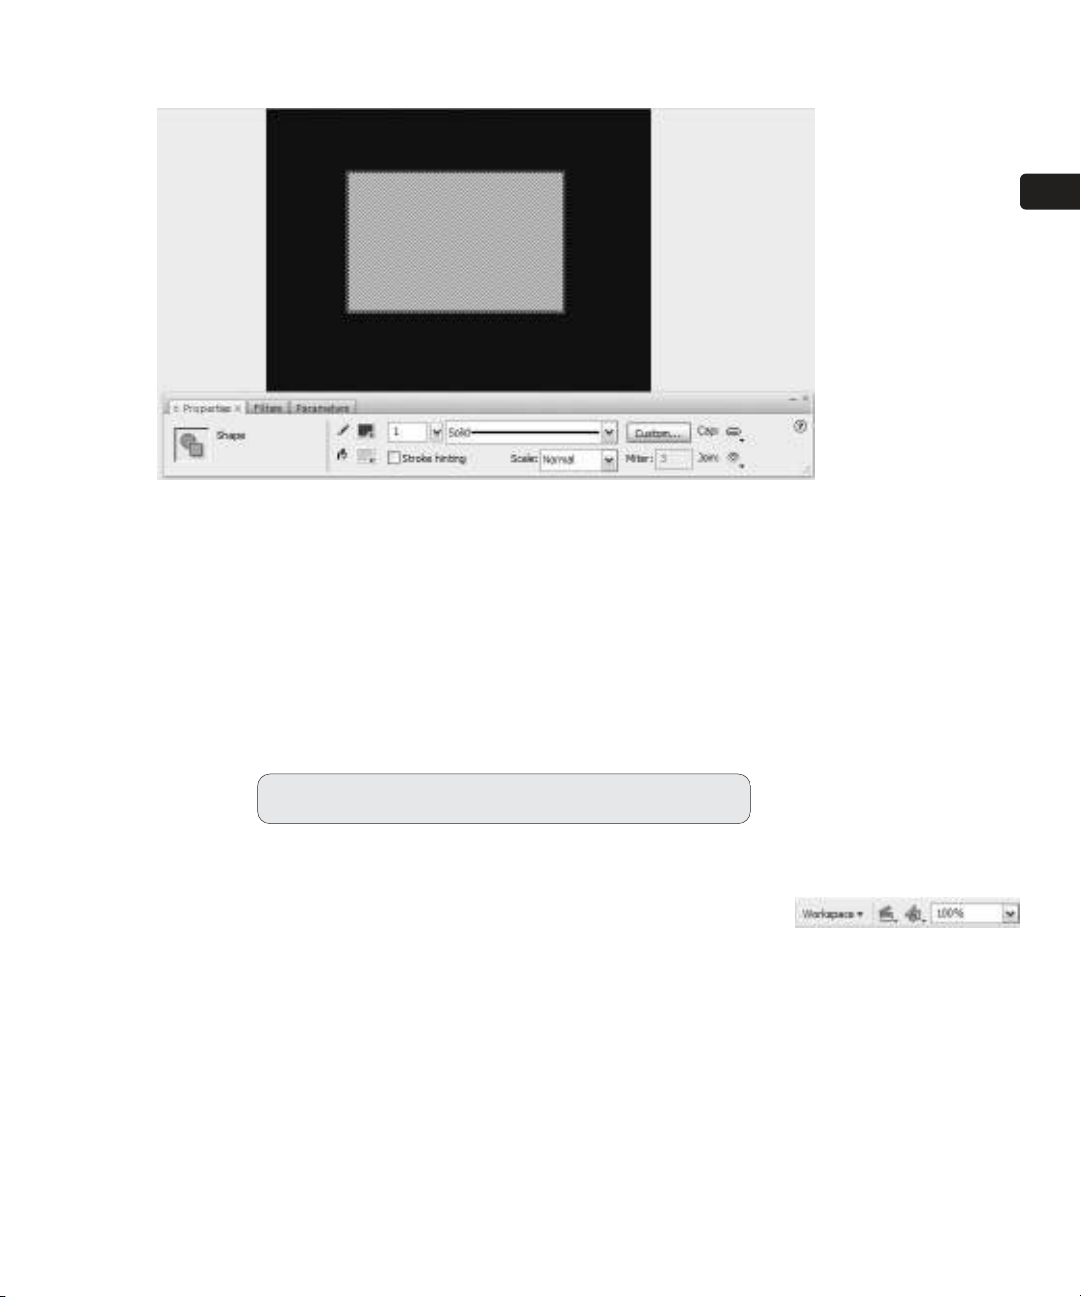
Figure 1-10. The Property inspector changes to show you the properties that can be manipulated
regarding a selected object on the stage (in this case, the stroke and fill properties of the box on
the stage).
Zooming the stage
There will be occasions when you will discover that the stage is a pretty crowded place. In
these situations, you’ll want to be sure that each item on the stage is in its correct position
and is properly sized. Depending on the size of the stage, this could be difficult because
the stage may fill the screen area. Fortunately, Flash allows you to reduce or increase the
magnification of the stage through a technique called zooming.
Follow these steps to zoom the stage:
1. Click the Magnification drop-down menu near the upper-right corner of
the screen (see Figure 1-11). The drop-down contains a variety of sizes
ranging from Fit in Window to 800% magnification.
If you want more zoom, you can get a lot closer than 800%. Select
View ➤Zoom In to increase the zoom level to 2000%. If you want a real
god’s-eye view of the stage, Zoom Out allows you to reduce the magnification level
to 8%. For you keyboard junkies, Zoom In is Ctrl+= and Zoom Out is Ctrl+-. On the
Mac, the commands are Command++ to zoom in and Command+- to zoom out.
Zooming the stage has no effect upon the actual stage size.
LEARNING THE FLASH CS3 PROFESSIONAL INTERFACE
13
1
Figure 1-11. Select a zoom level
using the Magnification drop-
down.
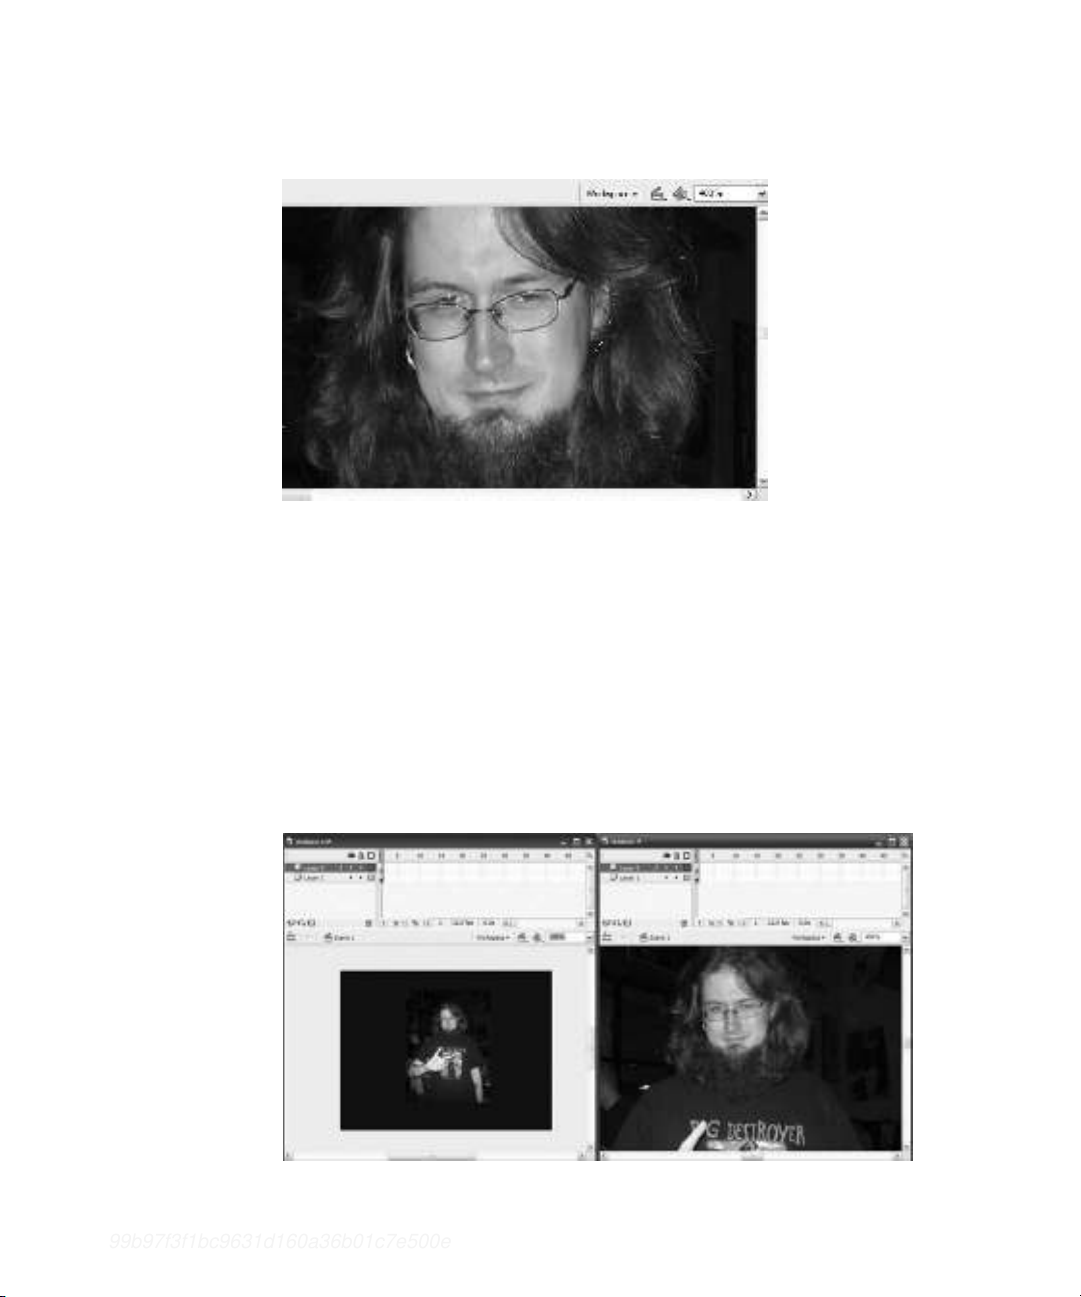
2. Click the 400% option, and the stage will fill the screen (as shown in Figure 1-12).
Click the Show Frame option and the stage will be visible in its entirety.
Figure 1-12. Selecting a 400% zoom level brings you close to the action.
If you want a side-by-side comparison in which one image is at 100% view and the other is
at 400% or 800%, follow these steps:
1. Select Window ➤Duplicate Window.The current document will appear in a separate tab.
2. Set the new window’s magnification level to 400% or 800%.
3. Select Window ➤Tile.The two windows will appear beside each other, and any
change made to the contents in one window will be reflected in the other window
(see Figure 1-13). This is a handy feature if you need to really zoom in on an object
or the stage to precisely position or change a property, yet want to see how your
change will work with the rest of the content on the stage.
4. To close a window, click its Close button.
Figure 1-13. Duplicating a window and then tiling the open windows gives you a bird’s-eye
view and a detailed view of your work simultaneously.
FOUNDATION FLASH CS3 FOR DESIGNERS
14 99b97f3f1bc9631d160a36b01c7e500e
Exploring the panels in the Flash interface
At this point in our stroll through the Flash interface, you have had the chance to play with
afew of the panels. We also suspect that by this point you have discovered that the Flash
interface is modular. By that we mean that it’s an interface composed of a series of panels
that contain the tools and features you will use on a regular basis, rather than an interface
that’s locked in place and fills the screen. You have also discovered that these panels can
be moved around and opened or closed depending upon your workflow needs. In this sec-
tion, we are going to take a closer look at the more important panels that you will use
every day. They include the following:
The timeline The library
The Property inspector The Actions panel
The Tools panel The Help panel
The timeline
There is a fundamental truth to becoming proficient with Flash: master the timeline and
you will master Flash.
When somebody visits your site and an animation plays, Flash treats that animation as a series
of still images. In many respects, those images are comparable to the images in a roll of film
or one of those flip books you may have played with when you were younger. The ordering of
those images on the film or in the book is determined by their placement on the film or in the
book. In Flash, the order of images in an animation is determined by the timeline.
The timeline, therefore, controls what the user sees, and more importantly, when he or she
sees it.
At its most basic, all animation is movement over time, and all animation has a start point
and an end point. The length of your timeline will determine when animations start and
end, and the number of frames between those two points will determine the length of the
animation. As the author, you control those factors.
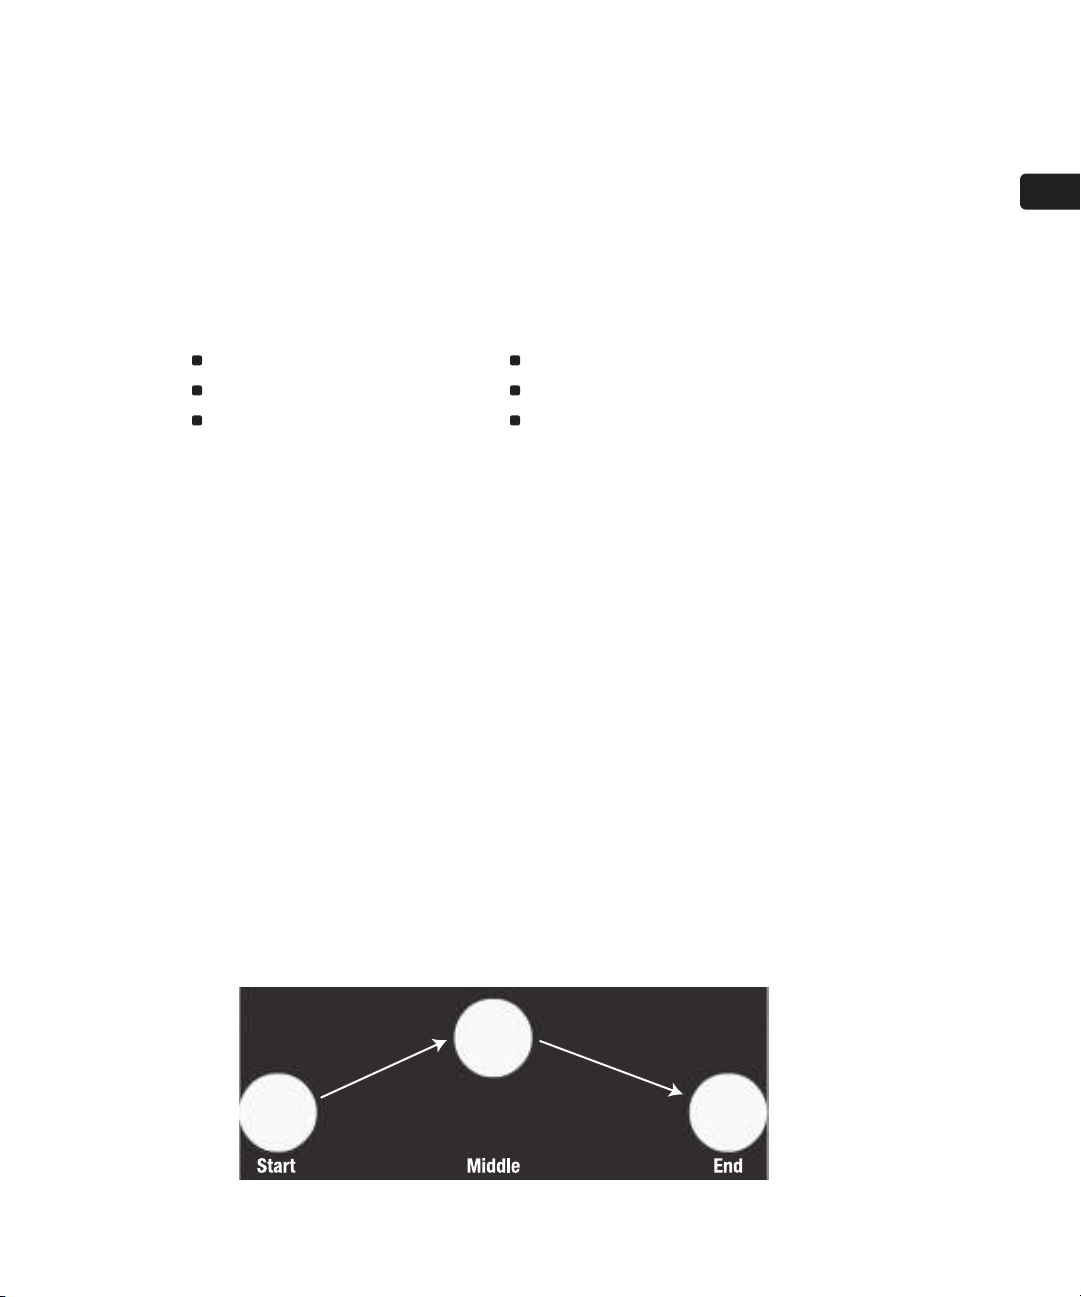
For example, Figure 1-14 shows you a simple animation. A ball is placed at the left and right
edges of the stage. In between, the ball is at the top of the stage. From this, you can gather
that the ball will move upward when the sequence starts and will continue to its finish posi-
tion at the right edge of the stage once it has reached the middle of the sequence.
Figure 1-14. A simple animation sequence
LEARNING THE FLASH CS3 PROFESSIONAL INTERFACE
15
1
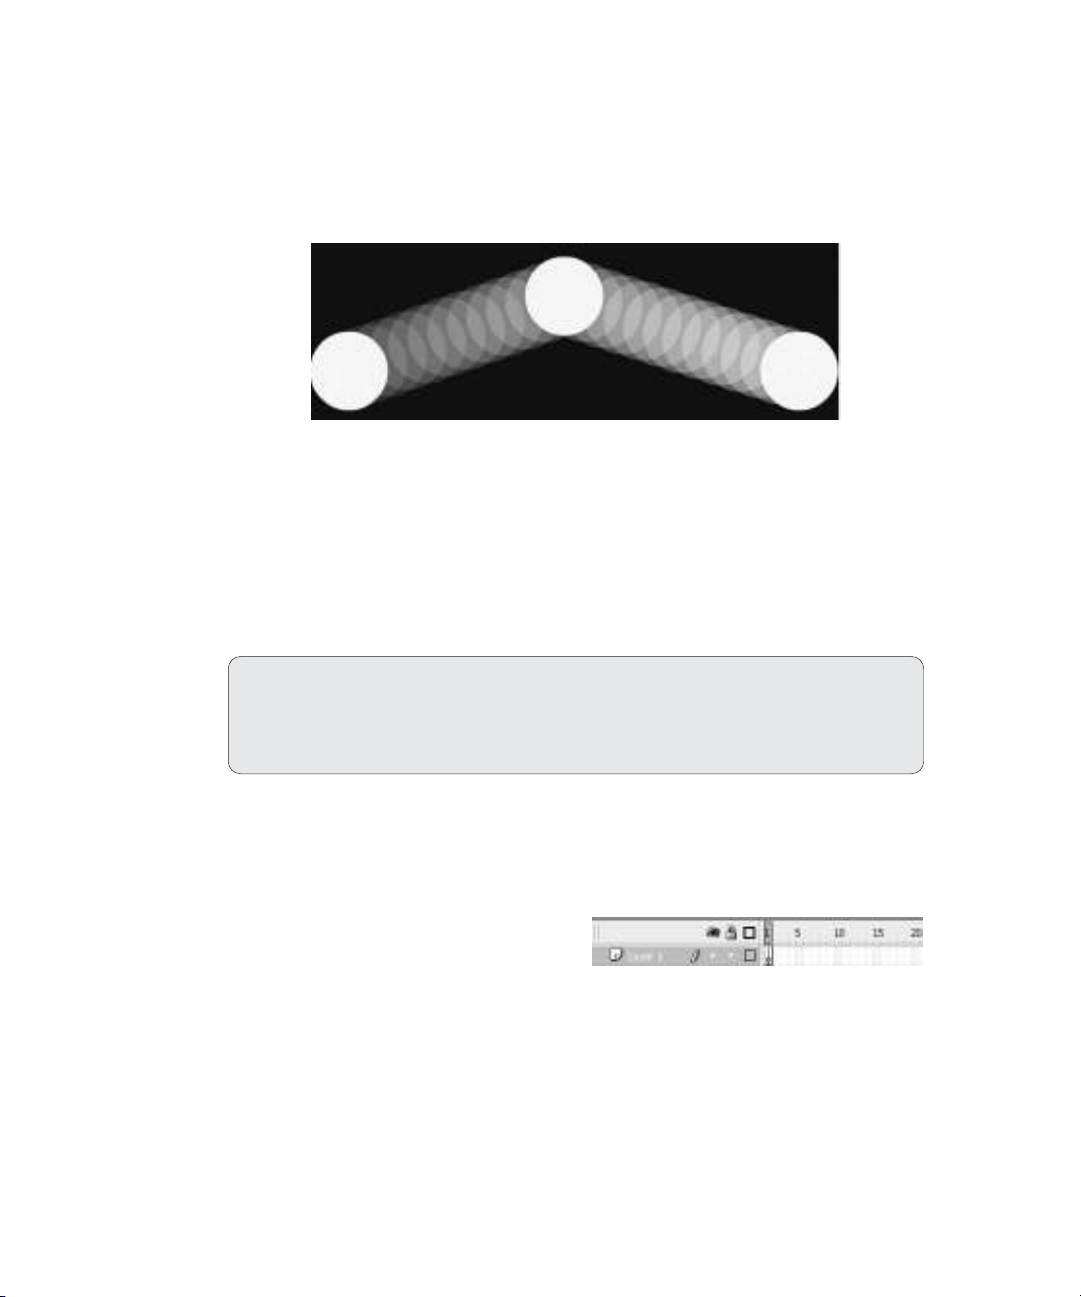
Obviously, just having three images won’t result in a ball moving. Between the start and
the middle, and the middle and the end points, there needs to be a series of ball images.
These will give the user the illusion of a ball moving up and returning down to its finish
position. These images will represent the various locations of the ball as it moves through
time (as shown in Figure 1-15).
Figure 1-15. Animation is a series of frames on the timeline.
So where does time come into play? It is the number of frames between the start and mid-
dle or middle and end points in the animation. The default timing in a Flash movie—called
frame rate—is 12 frames per second (fps). In the animation shown previously, the duration
of the animation is 24 frames, which means it will play for 2 seconds. You can assume from
this that the ball’s middle location is the 12th frame of the timeline. If, for example, you
wanted to speed up the animation, you would reduce the length of the timeline to 12
frames; if you wanted to slow it down, you would increase the number of frames to 48.
Let’s wander over to the timeline and look at a frame.
Frames
If you unroll a spool of movie film, you will
see that it is composed of a series of indi-
vidual still images. Each image is called a
frame, and this analogy applies just as well
to Flash as it does for the film industry.
When you open Flash, your timeline will be empty, but you will see a series of rectangles—
these are the frames. You may also notice that these frames are divided into groups. Most
frames are white and every fifth frame is gray (see Figure 1-16).
Flash movies can range in length from 1 to 16,000 frames, although a Flash movie that is
16,000 frames in length is highly unusual. The thing you need to keep in mind is that a
frame shows you the content that is on the stage at any point in time. The content in a
In the lower-left corner of the timeline, under the layers, is an icon that looks like a
piece of film. It is the Hide Timeline button. Click it and the timeline will be minimized.
Click it again and the timeline will return. If you are a Flash 8 user, note that this icon
replaces the Timeline button that was located in the upper-left corner of the timeline.
FOUNDATION FLASH CS3 FOR DESIGNERS
16
Figure 1-16. The timeline is nothing more than
a series of frames.


![Phân tích số liệu và biểu đồ bằng R: Tài liệu [Mô tả/Hướng dẫn/Kinh nghiệm chi tiết]](https://cdn.tailieu.vn/images/document/thumbnail/2026/20260430/ntu.danghuy@gmail.com/135x160/46211777946371.jpg)


