Hướng dẫn tạo bộ cài đặt Windows 8.1 RTM All in one
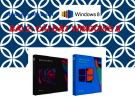
Windows 8.1 RTM All in one là bộ cài đặt tổng hợp các phiên bản Win 8.1 vào 1
file iso duy nhất. Hướng dẫn tạo bộ cài đặt định dạng ISO nhanh chóng mà hiệu
quả cho các bạn. Tự tay tạo nên sự khác biệt.
Trước hết bạn cần có bộ cài của Windows 8.1 RTM
Hướng dẫn tạo bộ cài đặt Windows 8.1 RTM All in one
Hướng dẫn tạo bộ cài đặt Windows 8.1 RTM All in one
Ý tưởng tạo Windows 8.1 RTM All in one
Hiện có 4 tập tin ISO của 4 phiên bản Windows 8.1 RTM, bao gồm Windows 8.1
Pro RTM hệ 32bit và 64bit, cùng Windows 8.1 Enterprise RTM hệ 32bit và 64bit.
Như vậy là bạn phải tiến hành ghi ra 4 DVD, với mỗi DVD là một bản Windows,
thật là lãng phí phải không.
Bài viết hướng dẫn tạo DVD All in One (tất cả trong một) bao gồm 1 lúc 4 phiên
bản Windows 8.1 RTM
Bước 1: Tải về và cài đặt Windows Assessment and Deployment Kit (ADK) tại
đây
Bước 2: Khởi động Windows Assessment and Deployment Kit , bỏ chọn ở tất cả
các ô ngoại trừ Deployment Tools
Bước 3: Tạo 1 thư mục trên ổ đỉa ‘C’ hệ thống và đặt tên là ‘win81aio’
Bước 4: Tiếp tục tạo 6 thư mục con trong ‘win81aio’ và đặt tên lần lượt là : win81,
x86, x64, entx86, entx64, mount
Bước 5: Tiến hành giải nén tập tin ISO của Windows 8.1 Pro RTM x86 và sao
chép tập tin ‘install.wim’ từ ‘win81\sources’ và dán vào thư mục ‘x86′ ở bước trên.
Tập tin x64 cũng làm tương tự nhưng dán vào thư mục ‘x64′
Bước 6: Tiến hành giải nén tập tin ISO của Windows 8.1 Enterprise RTM x86 và
sao chép tập tin ‘install.wim’ từ ‘win81\sources’ và dán vào thư mục x86 ở bước
trên. Tập tin x64 cũng làm tương tự
Bước 7: Mở công cụ Deployment and Imaging bằng quyền quản trị cao nhất
(Admin) bằng CMD và nhập vào dòng lệnh sau:
Dism /Export-Image /SourceImageFile:c:\win81aio\x86\install.wim
/SourceIndex:2 /DestinationImageFile:c:\win81aio\win81\sources\install.wim
/DestinationName:”Windows 8.1″ /compress:maximumDism /Export-Image
/SourceImageFile:c:\win81aio\x86\install.wim /SourceIndex:1
/DestinationImageFile:c:\win81aio\win81\sources\install.wim
/DestinationName:”Windows 8.1 Pro” /compress:maximumDism /Export-Image
/SourceImageFile:c:\win81aio\x86\install.wim /SourceIndex:1
/DestinationImageFile:c:\win81aio\win81\sources\install.wim
/DestinationName:”Windows 8.1 Pro with Media Center”
/compress:maximumDism /Export-Image
/SourceImageFile:c:\win81aio\entx86\install.wim /SourceIndex:1
/DestinationImageFile:c:\win81aio\win81\sources\install.wim
/DestinationName:”Windows 8.1 Enterprise” /compress:maximumDism /Export-
Image /SourceImageFile:c:\win81aio\x64\install.wim /SourceIndex:2
/DestinationImageFile:c:\win81aio\win81\sources\install.wim
/DestinationName:”Windows 8.1″ /compress:maximumDism /Export-Image
/SourceImageFile:c:\win81aio\x64\install.wim /SourceIndex:1
/DestinationImageFile:c:\win81aio\win81\sources\install.wim
/DestinationName:”Windows 8.1 Pro” /compress:maximumDism /Export-Image
/SourceImageFile:c:\win81aio\x64\install.wim /SourceIndex:1
/DestinationImageFile:c:\win81aio\win81\sources\install.wim
/DestinationName:”Windows 8.1 Pro with Media Center”
/compress:maximumDism /Export-Image
/SourceImageFile:c:\win81aio\entx64\install.wim /SourceIndex:1
/DestinationImageFile:c:\win81aio\win81\sources\install.wim
/DestinationName:”Windows 8.1 Enterprise” /compress:maximum
Bước 8: Tiến hành chuyển đổi sang ProfessionalWMC bằng lệnh sau:
Dism /mount-wim /wimfile:C:\win81aio\win81\sources\install.wim /index:3
/mountdir:C:\win81aio\mountDism /Image:C:\win81aio\mount /Get-
TargetEditionsDism /Image:C:\win81aio\mount /Set-
Edition:ProfessionalWMCDism /unmount-wim /mountdir:C:\win81aio\mount
/commitimagex /flags “ProfessionalWMC” /info
C:\win81aio\win81\sources\install.wim 3 “Windows 8.1 Pro with Media Center”
“Windows 8.1 Pro with Media Center”Dism /mount-wim
/wimfile:C:\win81aio\win81\sources\install.wim /index:7
/mountdir:C:\win81aio\mountDism /Image:C:\win81aio\mount /Get-
TargetEditionsDism /Image:C:\win81aio\mount /Set-
Edition:ProfessionalWMCDism /unmount-wim /mountdir:C:\win81aio\mount
/commitimagex /flags “ProfessionalWMC” /info
C:\win81aio\win81\sources\install.wim 7 “Windows 8.1 Pro with Media Center ”
“Windows 8.1 Pro with Media Center”
Bước 9: Tạo một tập tin với nội dung như sau và lưu lại với tên và định dạng là
‘ei.cfg’
[Channel] Retail
[VL] 0
Sau đó sao chép và dán vào đường dẫn ‘C:\win81aio\win81\sources’
Bước 10: Tiến hành tạo tập tin ISO sản phẩm. Mở lại công cụ Deployment and
Imaging bằng quyền quản trị cao nhất (Admin) bằng CMD và nhập vào dòng lệnh
sau:
oscdimg -bC:\win81aio\win81\boot\etfsboot.com -h -u2 -m -lwin81aio
C:\win81aio\win81\ C:\win81aio.iso
Ok, thế là xong. Bây giờ bạn hãy tiến hành sao chép và ghi tập tin Win81aio.iso
theo đường dẫn trên ra DVD và sử dụng nhé.
Chúc bạn thành công !


