Pencil painting
-
Timothy the Toucan inspired every budding artist with this engaging introduction to drawing. This colorfully illustrated book is loaded with fun projects which teach kids basic and imaginative drawing techniques. Includes a 32-page instruction booklet, drawing pad, pencil, sharpener, eraser, colored pencils, crayons, tracing paper, and stencil rulers. Children will love all the Let's Start characters in the series which includes the following: Numbers, Alphabet, Collage, Drawing, Modeling with Clay, Painting, Sand Art, and Stamp Art. Not for children under three years of age.
 45p
45p  natrids
 07-06-2015
 52
52
 10
10
 Download
-
Some of Arnold's biographers have declared that he was a very vicious boy, and have chiefly illustrated this fact by painting him as a ruthless robber of birds'-nests. But a great many boys who began life by robbing birds'-nests have ended it much more creditably. The astonishing and interesting element in Benedict Arnold's career was what one might term the anomaly and incongruity of his treason. Born at Norwich, Conn., in 1741, he was blessed from his earliest years by wholesome parental influences.
 147p
147p  nhokheo9
 06-05-2013
 50
50
 6
6
 Download
-
Other systems model different media, such as [TFN99], which describes a colored pencil drawing system. Their volume graphics approach models the interaction between the pencil lead and the paper. The pencil sketching program in [SB00] models the hardness and shape of the pencil tip, the paper texture, and interaction with erasers and blenders. Mosaicing was treated as a packing problem in [KP02]. Flatly colored containers were used to specify the major shapes for the desired mosaic.
 8p
8p  giamdocamnhac
 06-04-2013
 45
45
 2
2
 Download
-
Working with watercolour may at first seem strange and difficult, especially if you are use to opaque mediums such as oil or acrylic. The first and most obvious difference is the fact that watercolour is transparent. This means you must decide from the very beginning where the areas of white will be in your painting. The process for successful watercolour painting, is to avoid the areas to be left white and apply the lightest washes first, gradually working your way towards darker washes.
 7p
7p  moi_tim
 02-10-2012
 39
39
 6
6
 Download
-
The art of watercolor involves a great many techniques. One I follow is called the "direct method" and is achieved by attempting to paint accurate color values and shapes in the first stages of the painting process. Of course, adjustments will be made in some areas before the work is completed. Even so, the "direct method" saves a great deal of time and allows the colors to glow with freshness. Pencil Sketch The first step to success is to choose fine source material. I choose one of my own photographs that has good color and composition. Having taken the photo,...
 5p
5p  moi_tim
 02-10-2012
 55
55
 9
9
 Download
-
Watercolor portrait tutorial in 5 steps by Brainfree. Step 1 First draw a light drawing using watercolour paper. .Step 2 Paint a light blue and black undercolour using watercolour paint. .Step 3 Paint is a little heaver with slightly darker paint, showing a little time for the details. Use water and a blending brush to remove errors like painting over the top nail on the top finger. .Step 4 Almost done blend out all small problems and blend in edges also tighten the straight lines, like the hat brim. Last of all paint over the black areas with black ink or acrylic black to get that...
 6p
6p  moi_tim
 02-10-2012
 55
55
 5
5
 Download
-
When using masking fluid, it is so important to paint it in accurately. It should be used as if it were paint. So often, one is tempted to "generalize" when using masking fluid. In this detailed view, the masking fluid is easily visible because it is tinted yellow. There is a masking fluid on the market which is clear, but I find this very difficult to use because I can't see it on the page. Masking fluid is used to mask out areas which must remain white or light such as the lion cub's whiskers and the "spark" in...
 7p
7p  moi_tim
 02-10-2012
 39
39
 4
4
 Download
-
"Nelson Mandela Portrait in Watercolour" Cadmium Cerulean Burnt Yellow Blue Umber Blue Black Quinacridone Gold Geranium Lake Bluish Payne's Grey Additional colour (not shown) - Prussian blue Equipment 1. PAPER - Stretched sheet of watercolour paper (mine is Saunders Waterford 300g Rough Surface). 2. PAINT - Winsor & Newton Artists' Watercolour tubes Cadmium Yellow, Cerulean Blue, Burnt Umber, Blue Black, Quinacridone Gold. Lukas Artist's Watercolour tubes - Geranium
 17p
17p  moi_tim
 02-10-2012
 60
60
 4
4
 Download
-
Step 1 The outline of the photo (taken from the guide to Liverpool's museums!) is transferred to the board in pencil. You can see that parts of the face don't look quite right here. Sometimes this is an optical illusion created by the lack of tone, and once you get some shadows down it starts to look right. I had several problems with this painting, which will be addressed step by step.
 5p
5p  moi_tim
 02-10-2012
 40
40
 3
3
 Download
-
Before we get into the different pastel types, the first question to ask would be - what are pastels? Pastels - an art medium made up of pure pigment rolled into sticks and held together with some sort of binder. That's it! They allow you to paint and draw with color in a quick manner. That's why they are so Awesome!! How the pastels are produced can effect the makeup and characteristics of how the pastel will act on the paper. Some have a creamy rich texture while others are very chalk-like. It depends on which brand you use. This...
 6p
6p  moi_tim
 02-10-2012
 41
41
 3
3
 Download
-
Step 1. The Line Drawing The first step in creating a new painting is a line drawing that shows placement of objects. A line drawing can be simple outlines of shapes or can be detailed rendering of objects. Then the lines are transferred to paper or board for the final painting. To keep my paper clean, I usually transfer only one area at a time--whichever area I plan to work on next.
 4p
4p  moi_tim
 02-10-2012
 42
42
 3
3
 Download
-
Step 1 The initial sketch, again taken from a still frame of a DVD. This took no more than ten minutes, and serves only as a guide to the overall shape and placement of the features. Step 2 The sketch is transferred to the canvas board, still using a pencil. At this stage you can spray the picture with a fixative to prevent the pencil dirtying your paint, but I use a hard pencil and don't usually have a problem. The basic colour is applied in big sections, with minimal blending at this stage. ...
 5p
5p  moi_tim
 02-10-2012
 71
71
 4
4
 Download
-
Step 1 This pose came straight from a still frame of the Coldplay Live 2003 DVD. I sketched the outline onto the canvas in pencil, then blocked in the main areas of colour. The figure and piano contain no blending at this stage, but I wanted to get the background right early on. The coloured lights were difficult to paint, I first laid down the tones in grayscale, then applied the colours in a thin wash.
 5p
5p  moi_tim
 02-10-2012
 49
49
 5
5
 Download
-
A Great Sketch Results in a Great Painting How to use the Grid Method to Achieve Accurate Shape and Perspective in Art Failure to achieve accurate shape and perspective in a finished work of art is why many of us give-up and declare ourselves "non-artists." There's nothing worse for a student's artistic selfconfidence than having a painting of a horse turn-out looking more like a dog. Yet there is a simple method of ensuring that the finished work will have proper shape and perspective. Artists dating back to the ancient Egyptians knew of a technique to break down a...
 7p
7p  moi_tim
 02-10-2012
 66
66
 5
5
 Download
-
Our subject for this exercise is this Whistling Kite. All you will need for this exercise are two tubes of paint and two brushes plus a sheet of watercolor paper and a pencil. Materials Indigo Burnt Sienna 1" flat brush #2 liner brush HB lead pencil Watch this demonstration on RealPlayer Step 1 The first step is to loosely draw the basic shapes. The idea is not to carefully .draw every detail then fill it in, but to get a rough guideline for the major shapes. Don't worry about accurate details, but concentrate on accurate proportions. (HB lead pencil) ...
 6p
6p  moi_tim
 02-10-2012
 57
57
 4
4
 Download
-
Step 1 Basic colour applied in blocks with no blending. Lots of white space is showing through the gaps, which is something I try to avoid now. I originally painted in his curl of hair over the forehead, but then I painted it out, as I realised I would have to work on the flesh tone first, then paint the hair over it later. The general layout is looking good at this stage.
 5p
5p  moi_tim
 02-10-2012
 51
51
 3
3
 Download
-
Step 1 For this one I started off with a black undercoat, which I have never done before, and sketched in the outline with thin white paint. Step 2 The black background helps to show the contrast with the face, so, in applying the first layer of colour, I can easily see that the skin tone is too pale, and will need to be deepened. .Step 3 Another layer on the face, but it's still too pink. The shirt wasn't going well, so I decided to paint over it and start again.
 5p
5p  moi_tim
 02-10-2012
 47
47
 4
4
 Download
-
I use flax based canvas. The final size is 40 x 50 cm. For each step, I take about 30 to 60 minutes, so I do a portrait in about 5 to 8 hours average. Step 1 First I draw in pencil on the canvas. .Step 2 Then I add the first highlights flesh color. .Step 3 Then entour these highlights with darker flesh color. .Step 4 And again, darker.
 18p
18p  moi_tim
 02-10-2012
 60
60
 4
4
 Download
-
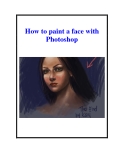
Tham khảo tài liệu 'how to paint a face with photoshop', văn hoá - nghệ thuật, mỹ thuật phục vụ nhu cầu học tập, nghiên cứu và làm việc hiệu quả
 5p
5p  moi_tim
 02-10-2012
 55
55
 5
5
 Download
-
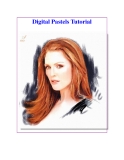
How I paint a digital pastel portrait? Generally I use Corel painter, a digital computer program, but I exploit its tools in a traditional way. First I open a blank white paper (file) and my reference photo. I prefer a big paper (over 2000.2000pix) because I have a lot of space to work and it is only in a big file that painting and drawing tools show there real natural characters. Step 1 I use a sketch or HB pencil tool and begin to draw. I start with the eyes and then nose and lips. .Step 2 In next stage I...
 6p
6p  moi_tim
 02-10-2012
 67
67
 6
6
 Download
CHỦ ĐỀ BẠN MUỐN TÌM


